
In my previous blog post (link here), I detailed the components and specifications of the deep-learning workstation that I had built. Now, in this post, I want to delve into the next critical step - setting up the system. Specifically, I will focus on the installation of the Ubuntu operating system and NVIDIA drivers, which is essential for running deep-learning computatons on the GPU. So, let’s get started!
Checking the BIOS on Initial System Boot
After finishing the build, the first time that you boot up the system, if everything is working properly, you will see a BIOS screen like this
New CPU installed. fTPM/PSP NV corrupted or fTPM/PSP NV structure changed.
Press Y to reset fTPM. If you have Bitlocker or encryption enabled, the system will not boot without a recovery key.
Press N to keep previous fTPM record and continue system boot. fTPM will NOT enable in new CPU, you can swap back to the old CPU to recover TPM related keys and data
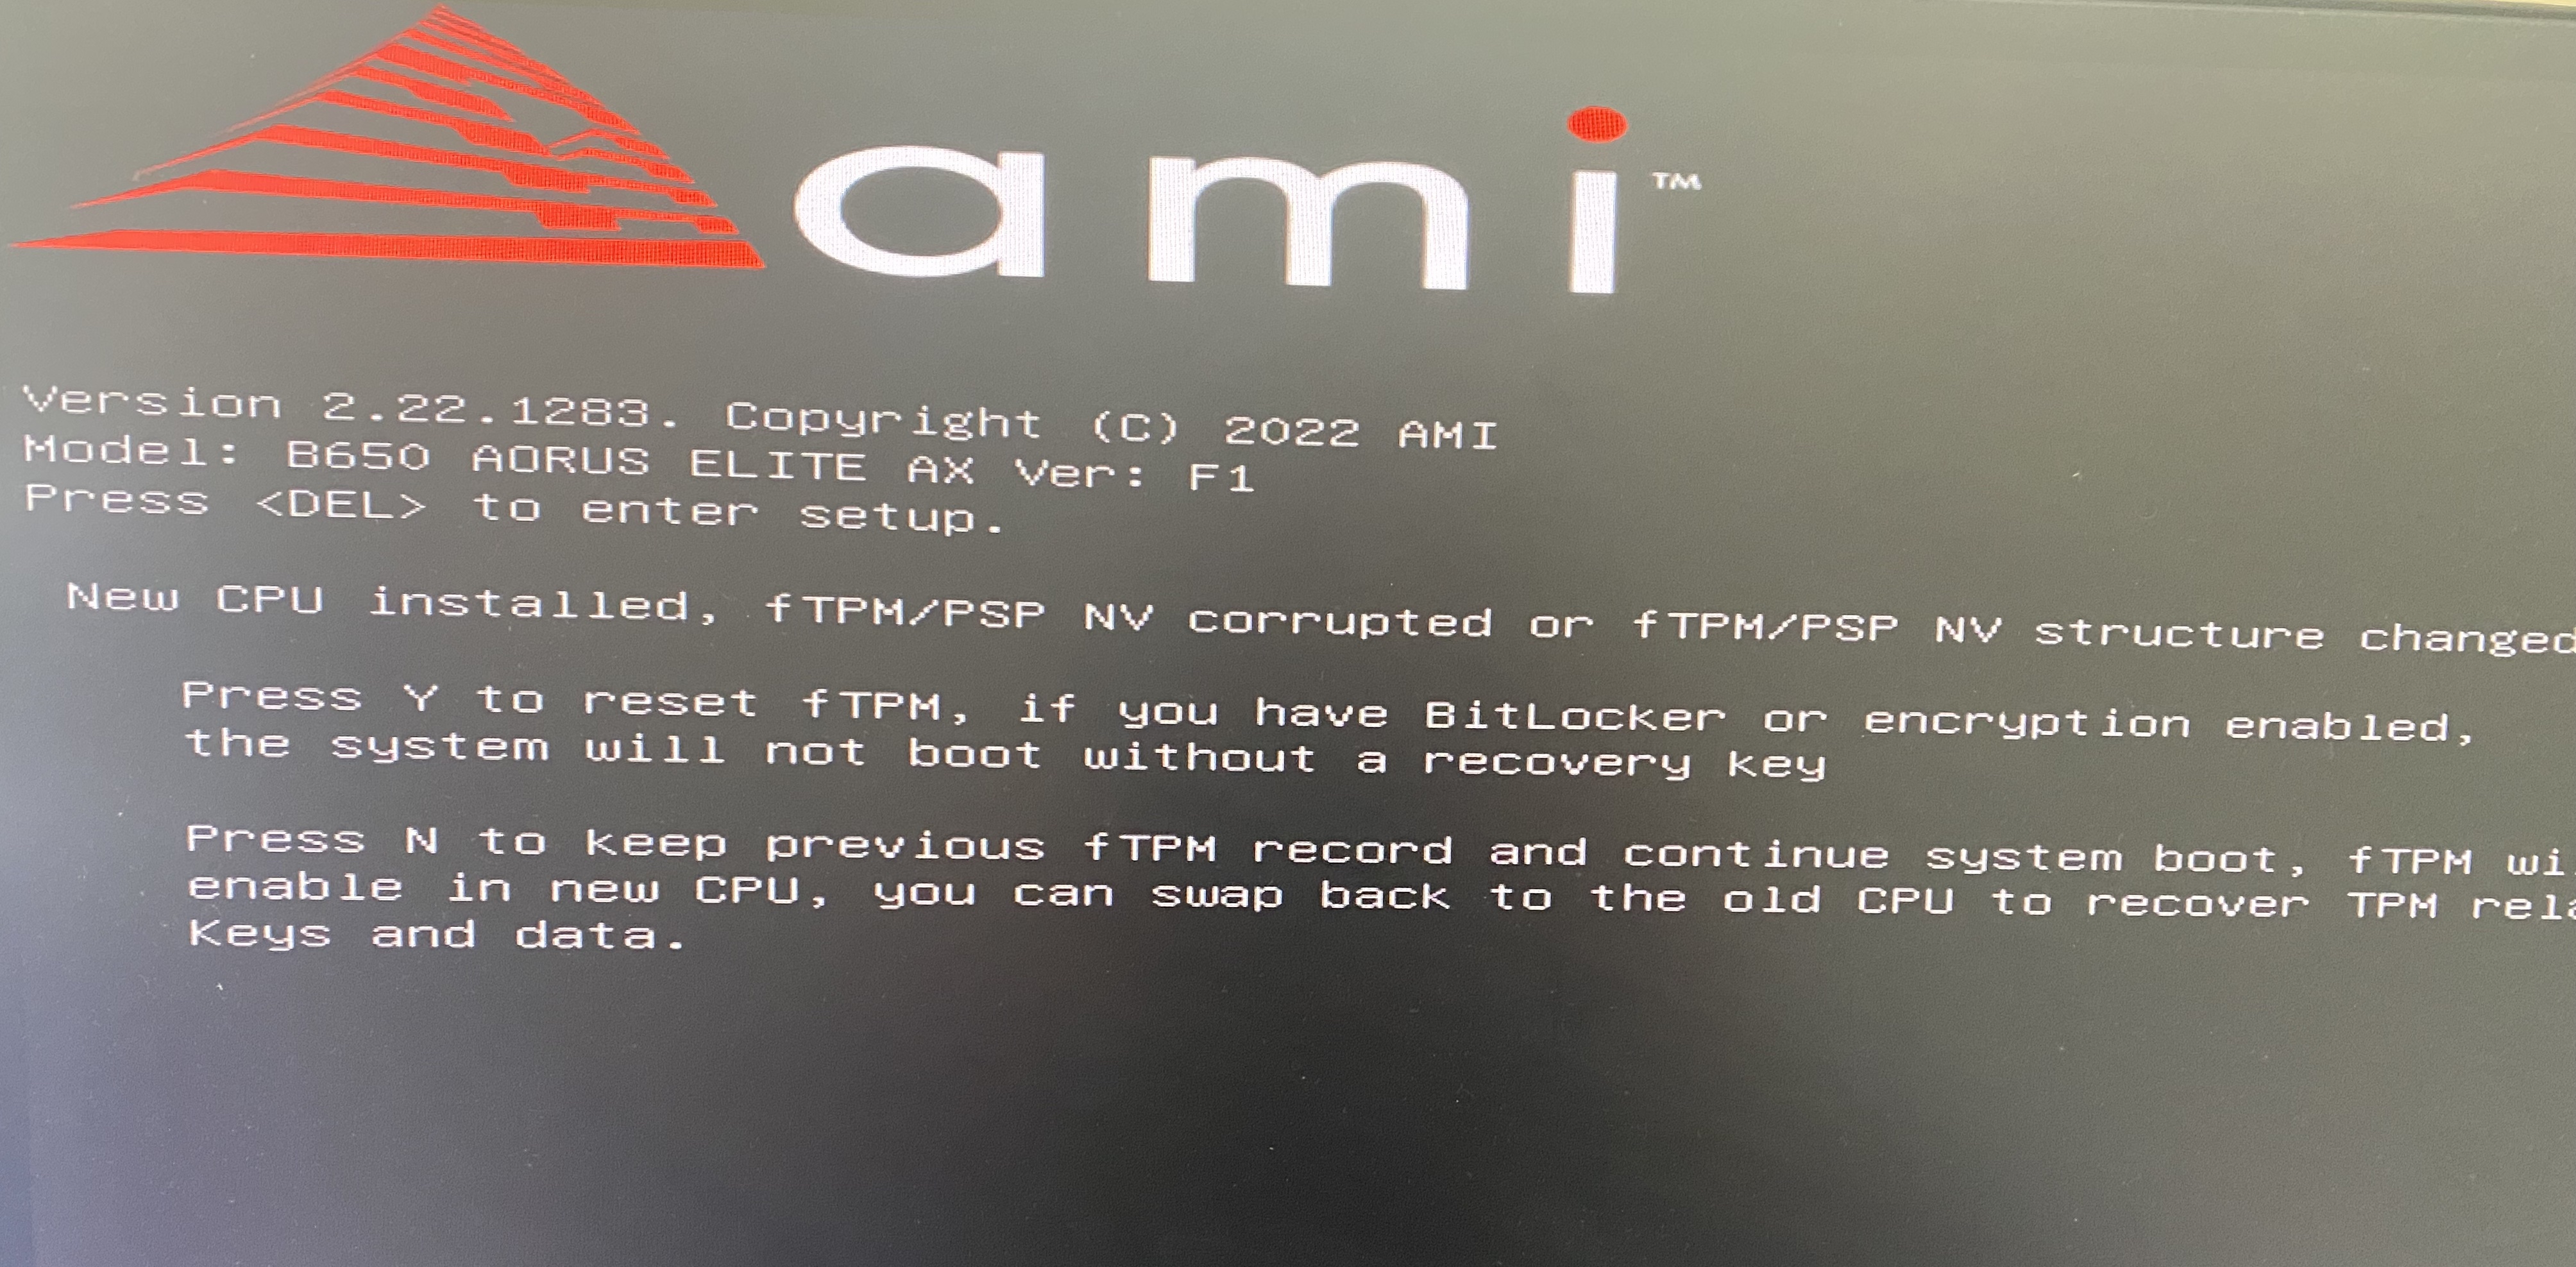
This error message is just because the moetherboard has recognized that a new CPU is installed.
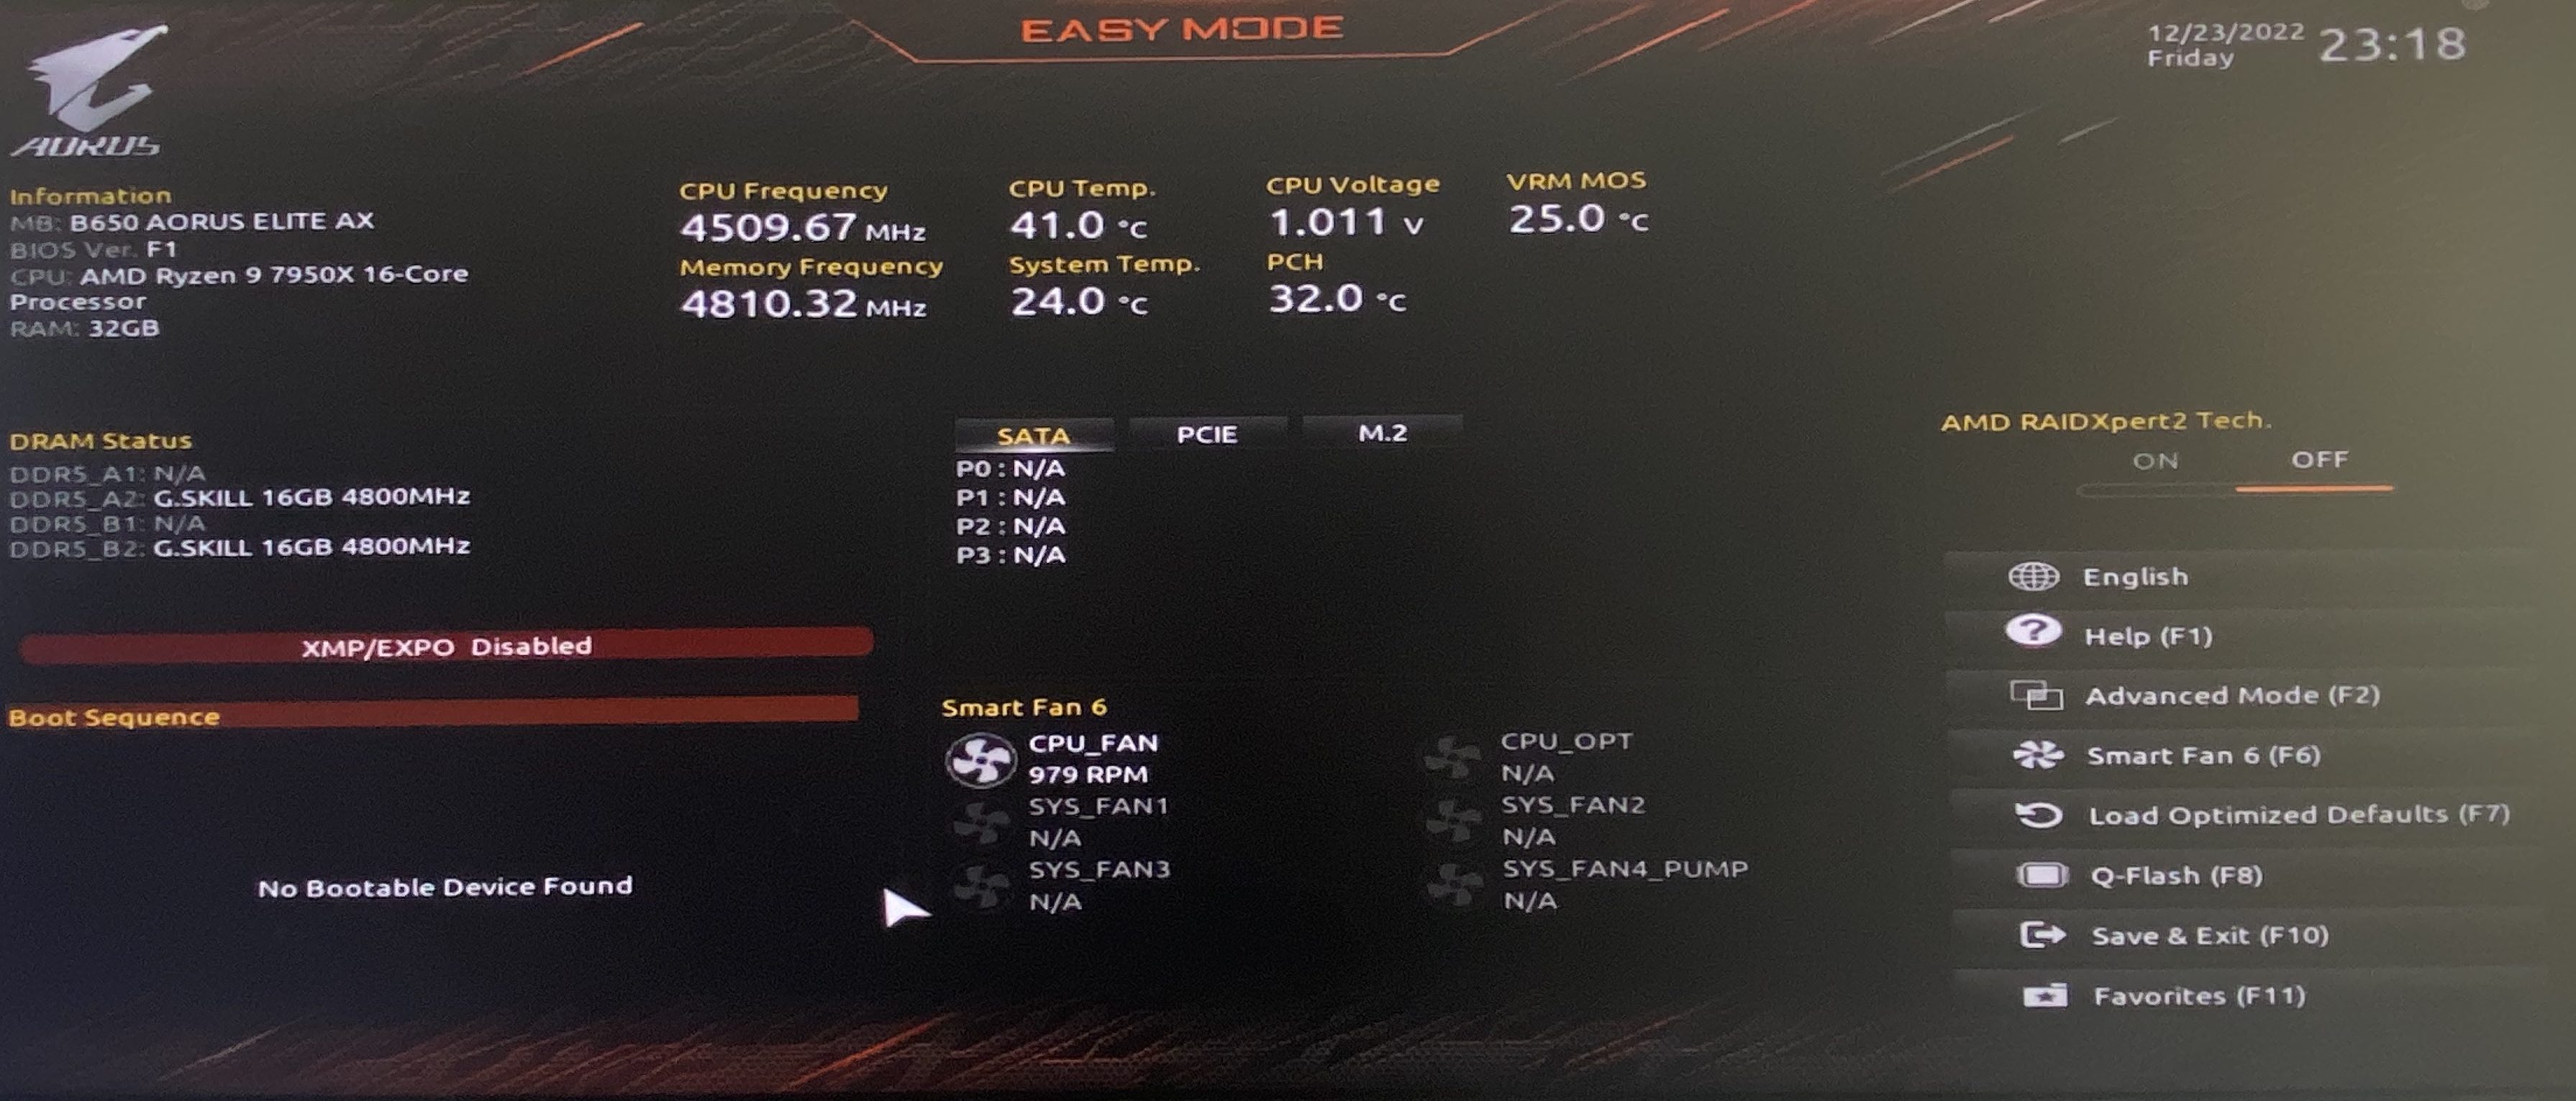
You can access the BIOS by pressing the Y key. In the BIOS, you can view various system information, such as the motherboard, CPU, and RAM details, as well as the temperature and fan speed.
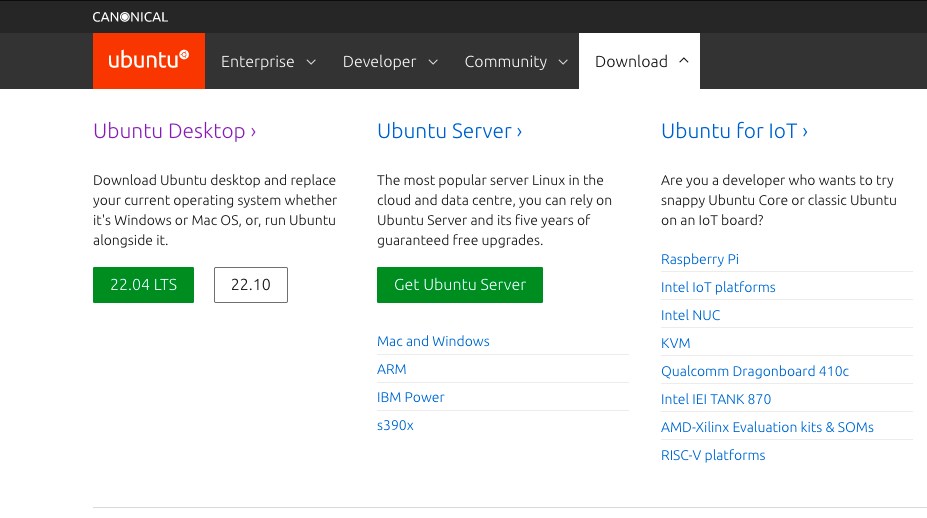
Now, it’s time to install an operating system, and since the primary purpose of this build is to run deep-learning applications, I chose to install the Ubuntu 22.04 LTS operating system, which has long-time-support.
Getting Ubuntu
Ubuntu has a very good step-by-step tutorials showing you how to download it, make a bootable USB drive (depending on your current operating system), and then going through the steps for installation. You can find the tutorials here.
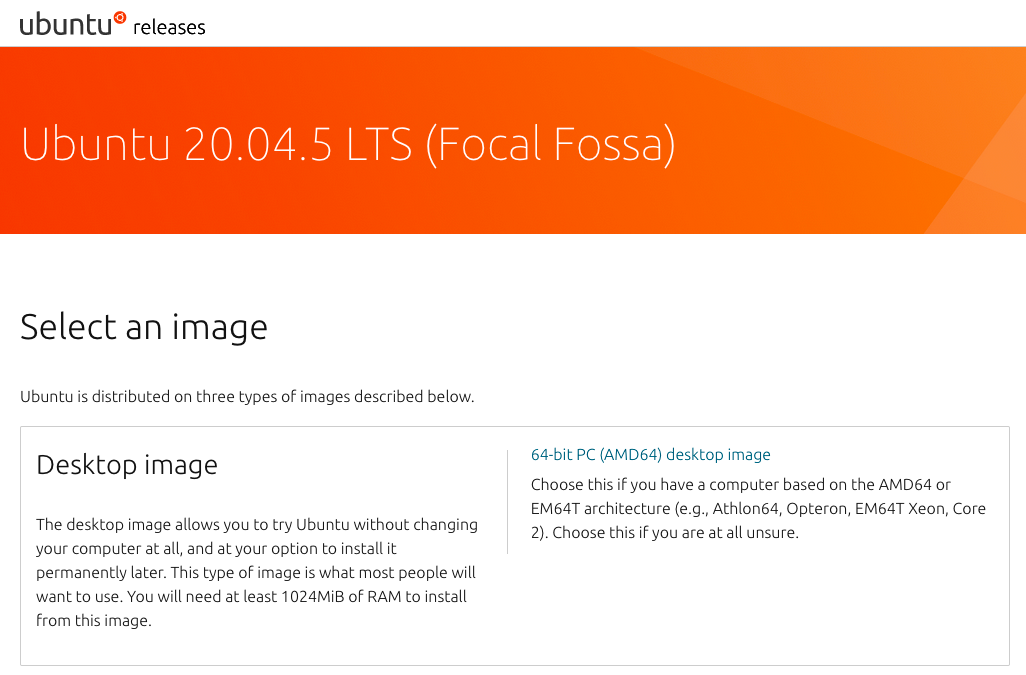
Currently, the default version available on the download page is Ubuntu 22.04 LTS, but in case you want to have previous releases, you can search for the specific version on the releases page (see table below).
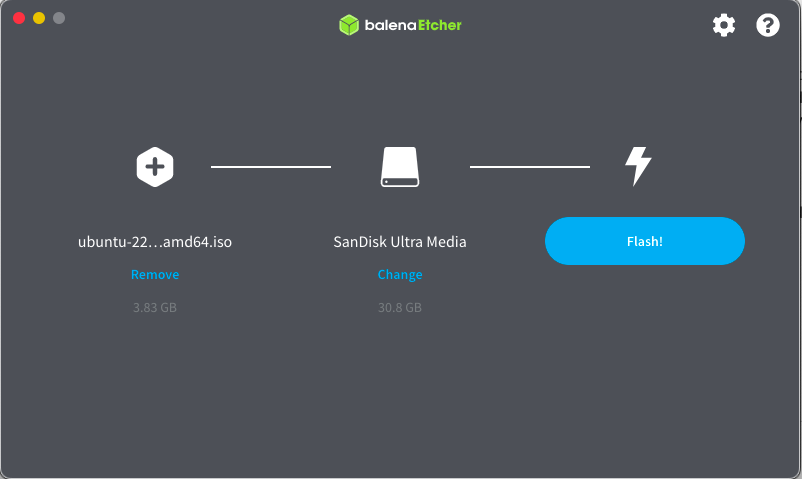
After downloading the installer ubuntu*.iso file, next step is to create a bootable USB drive. For this you would need to install a software on your existing operating system (Windows, Ubuntu, or Mac OS). On Mac OS, I have installed a program called BalenaEtcher (recommended by Ubuntu) for making the bootable installation drive. This step is simple, after inserting a USB stick and launching the program, simply select the downloaded ubuntu*.iso file and the USB drive.
Note: you may need to format the USB stick. Also, make a copy of your data before proceeding to this step.
Ubuntu installation
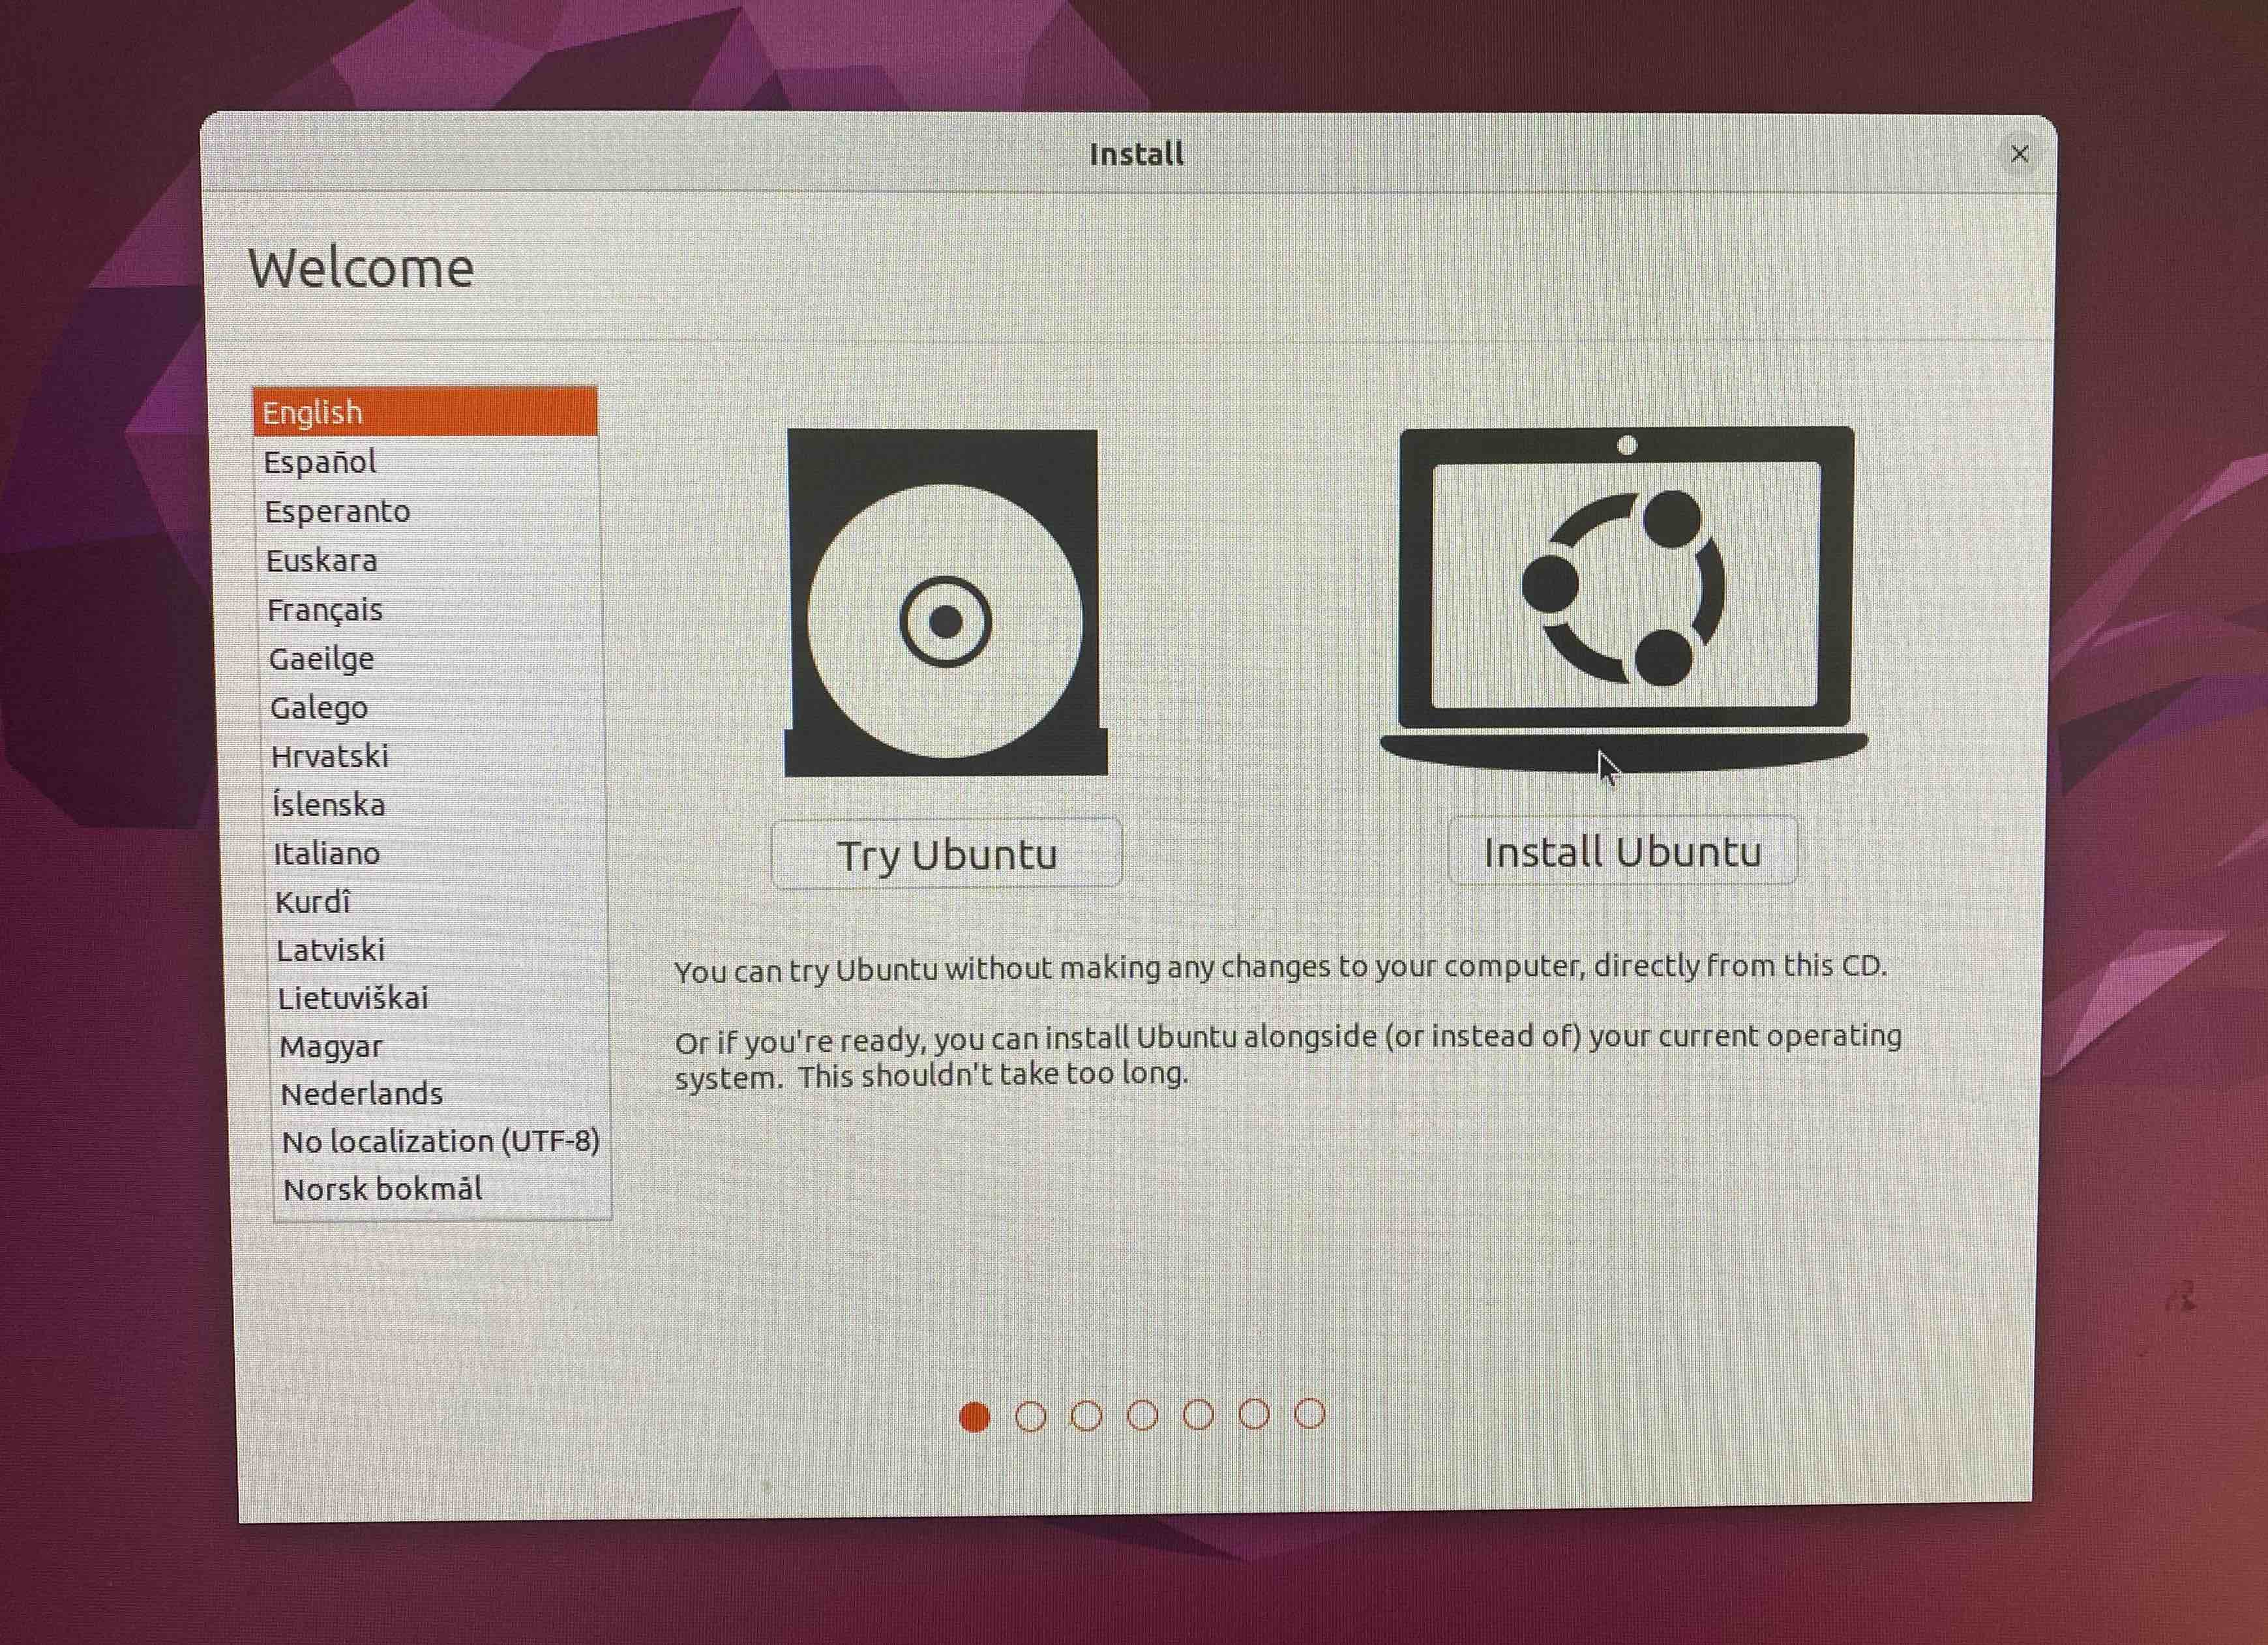
With the bootable USB drive, I rebooted the workstation that had no operating system and it automatcally brought the Ubuntu installation page.
- Step 0: Select boot medium
Press F12 key, and select the proper boot medium
| Boot selection (F12): | Ubuntu boot options: Select try or install Ubuntu |
 |
 |
- Step 1: Welcome-screen: Select Install Ubuntu
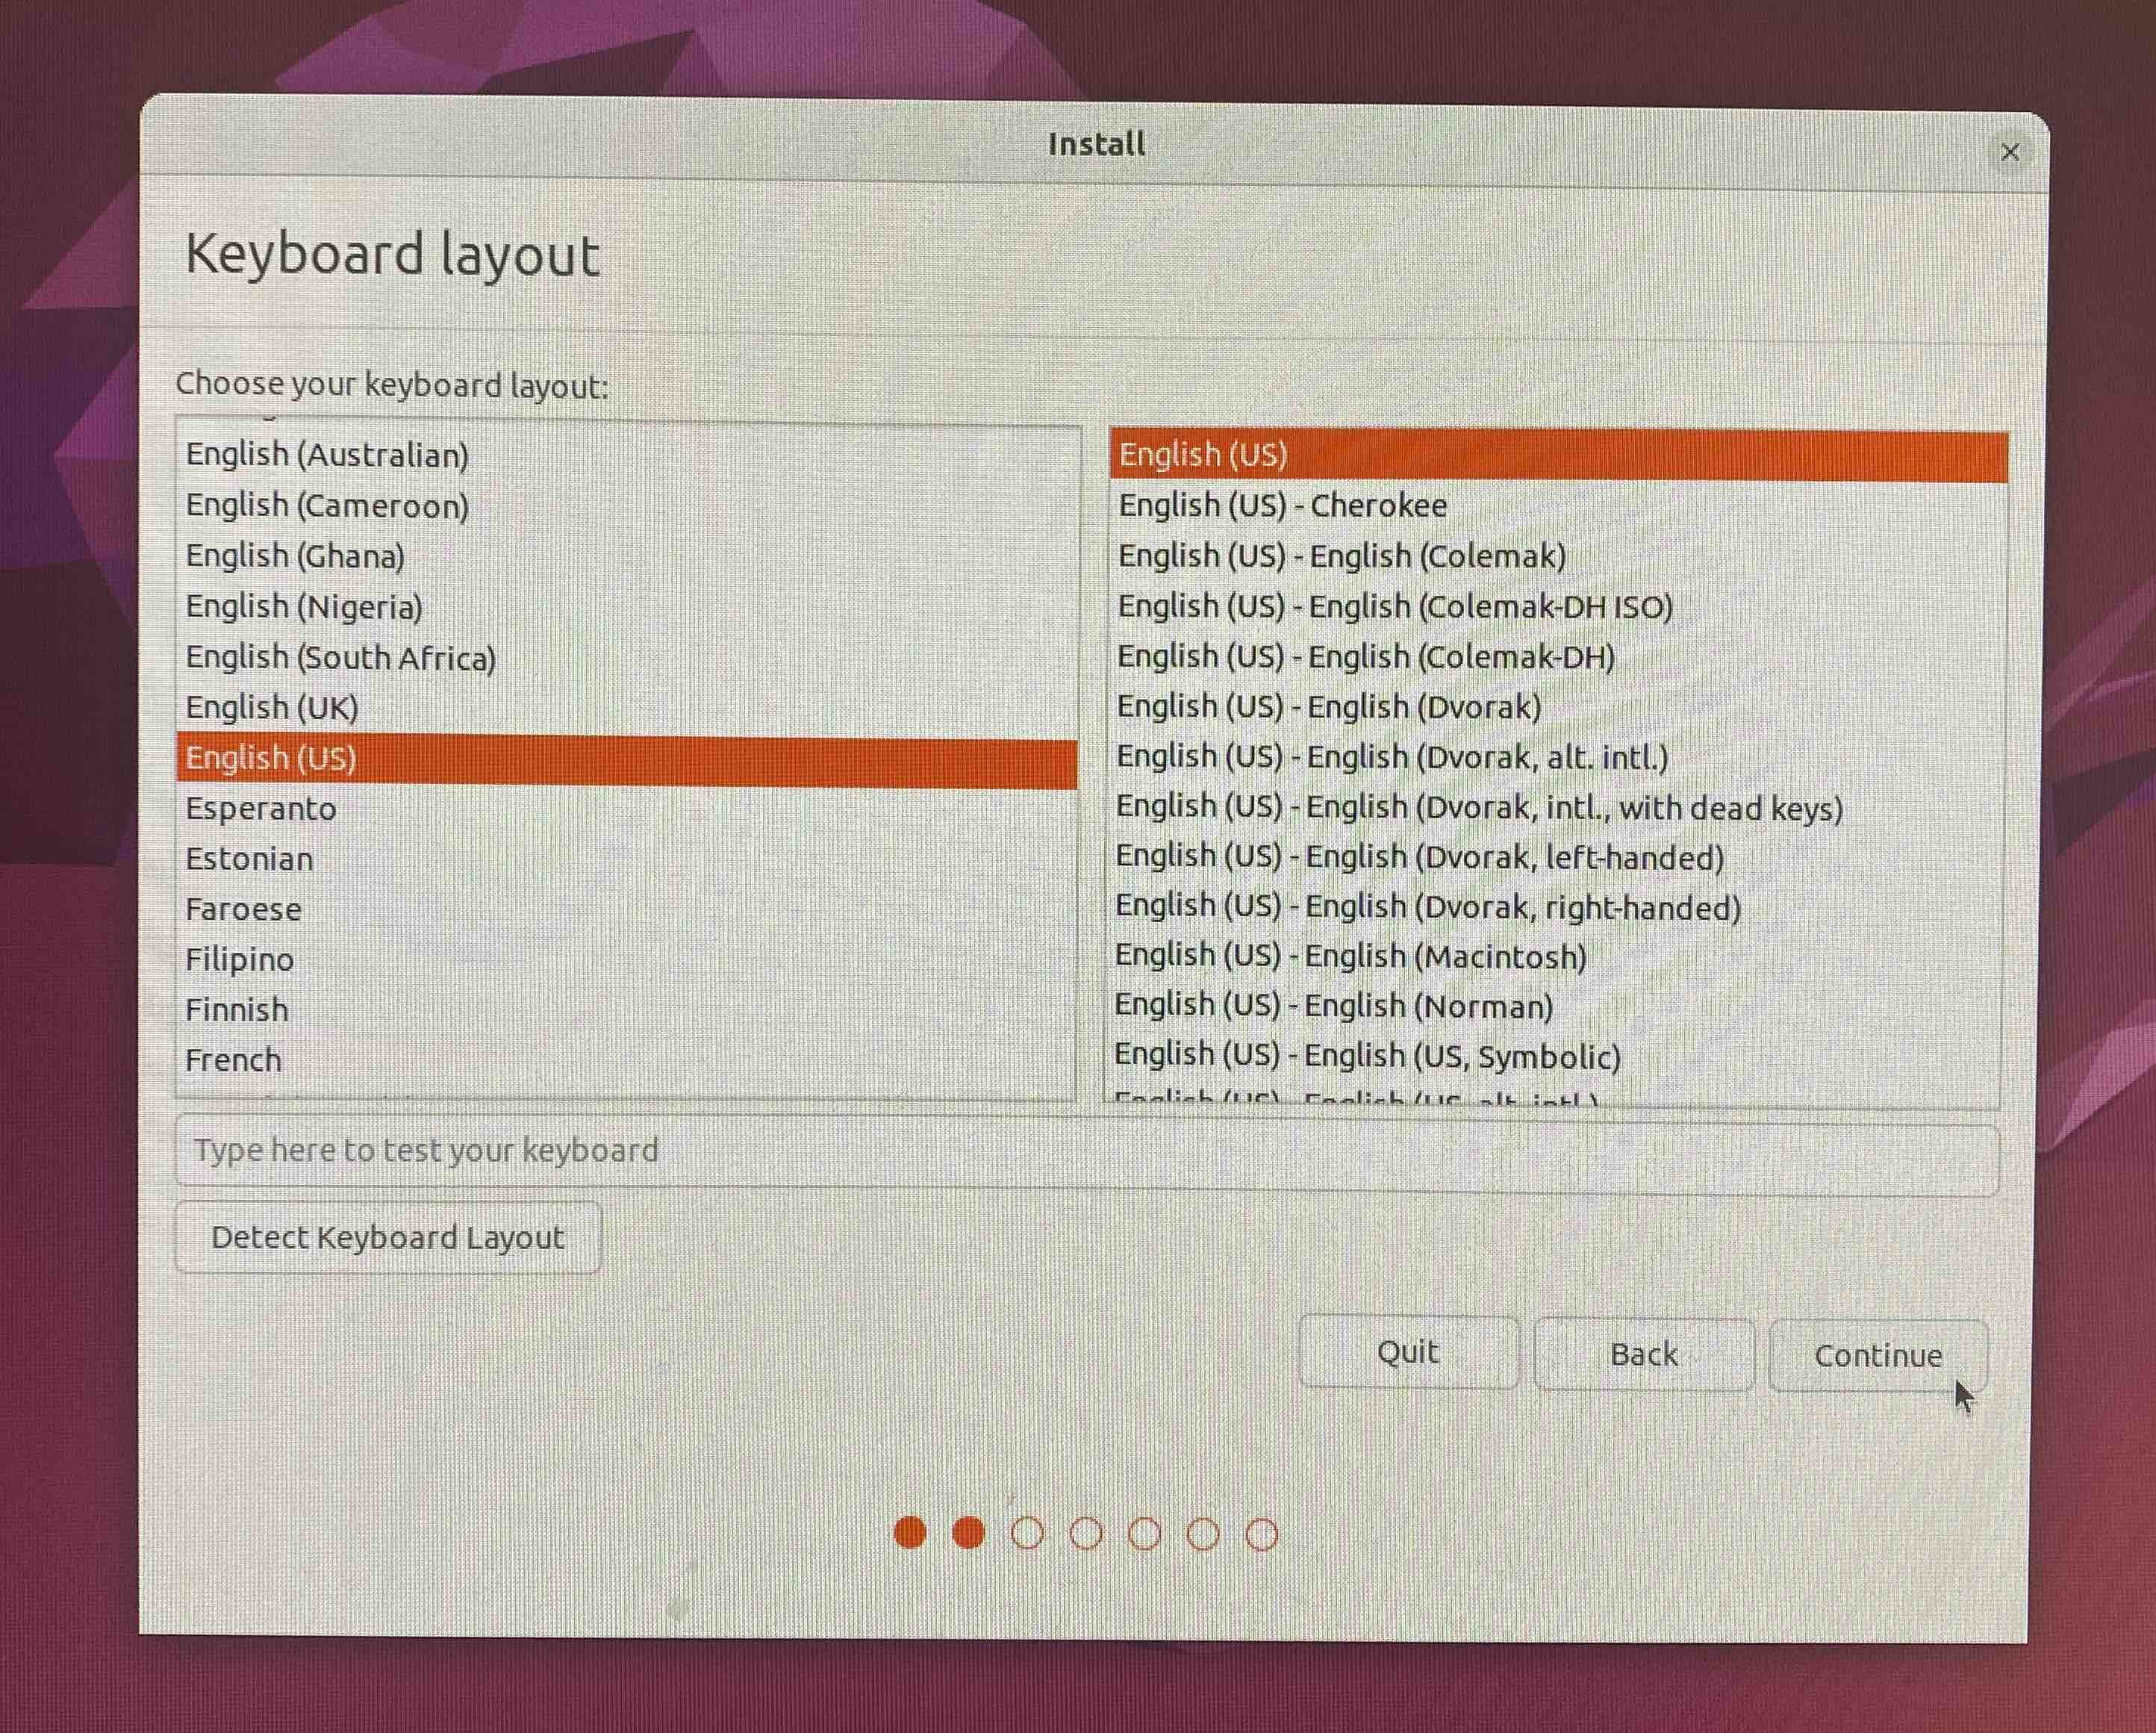
- Step 2: Select language
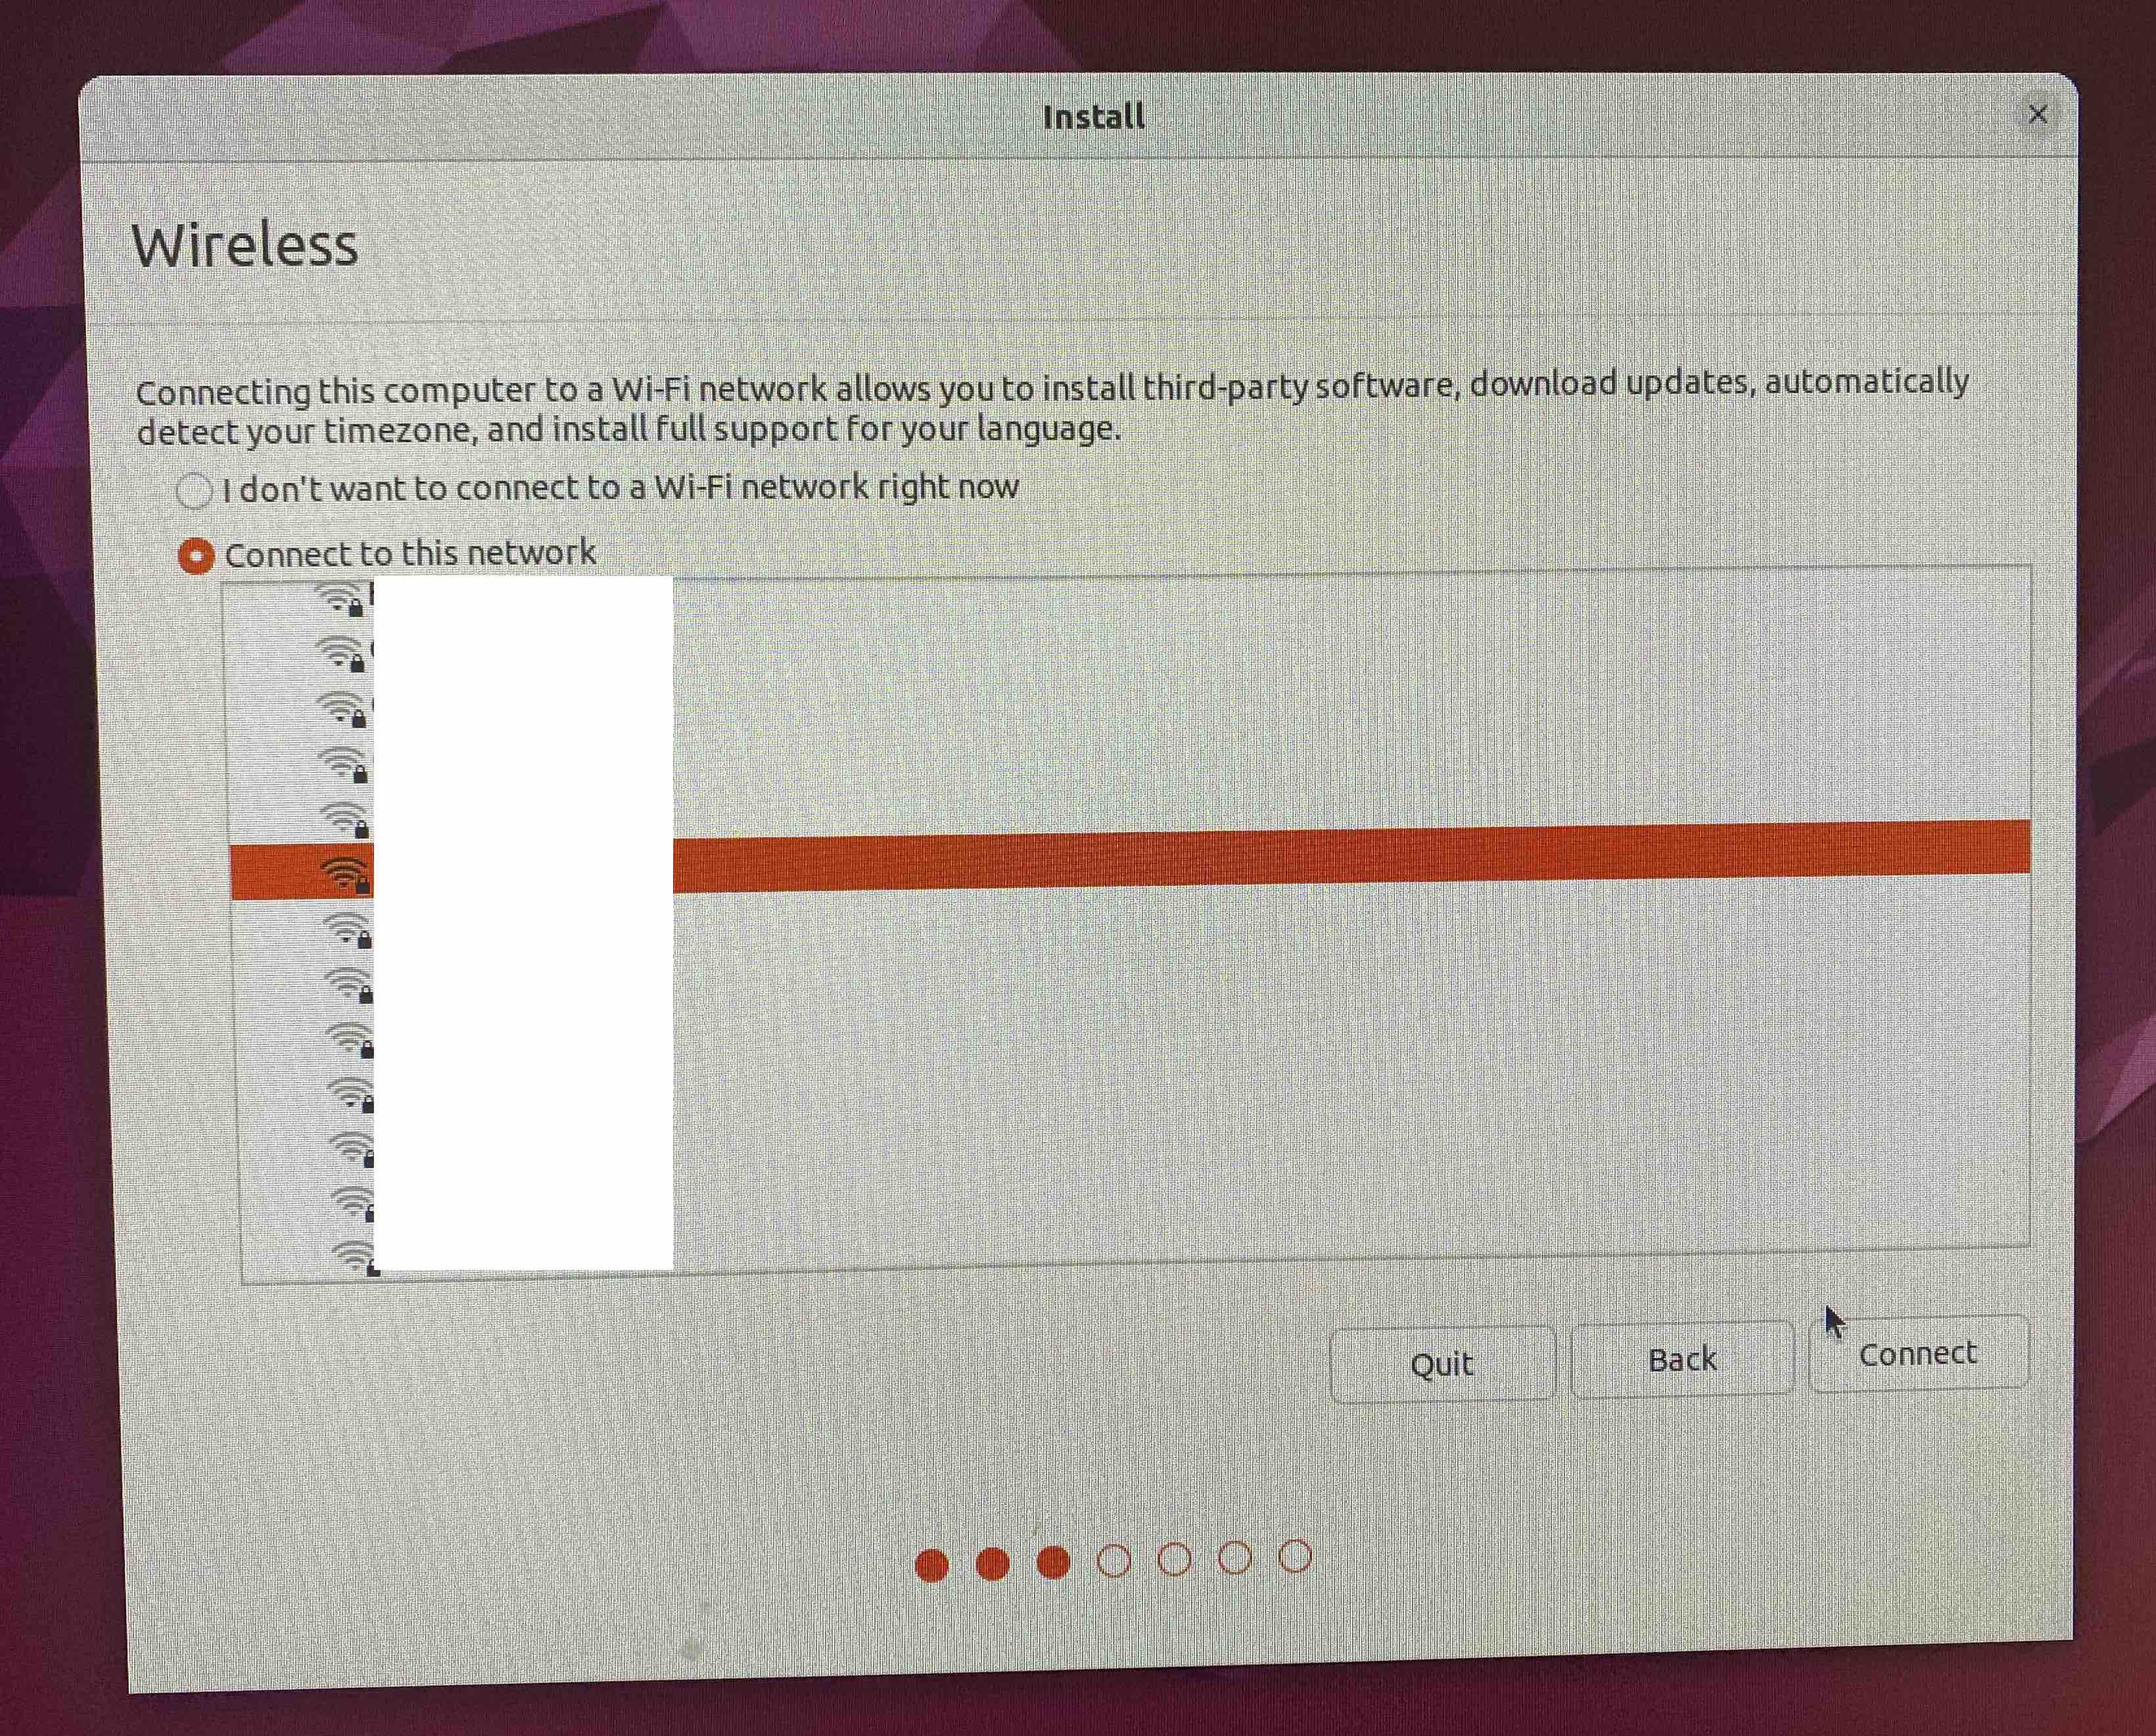
- Step 3: Select WiFi (or LAN network if available), and check the option for downloading third-part softwares
| Connect to WiFi (or LAN network) | Choose “Install Third-Party Softwares” |
 |
 |
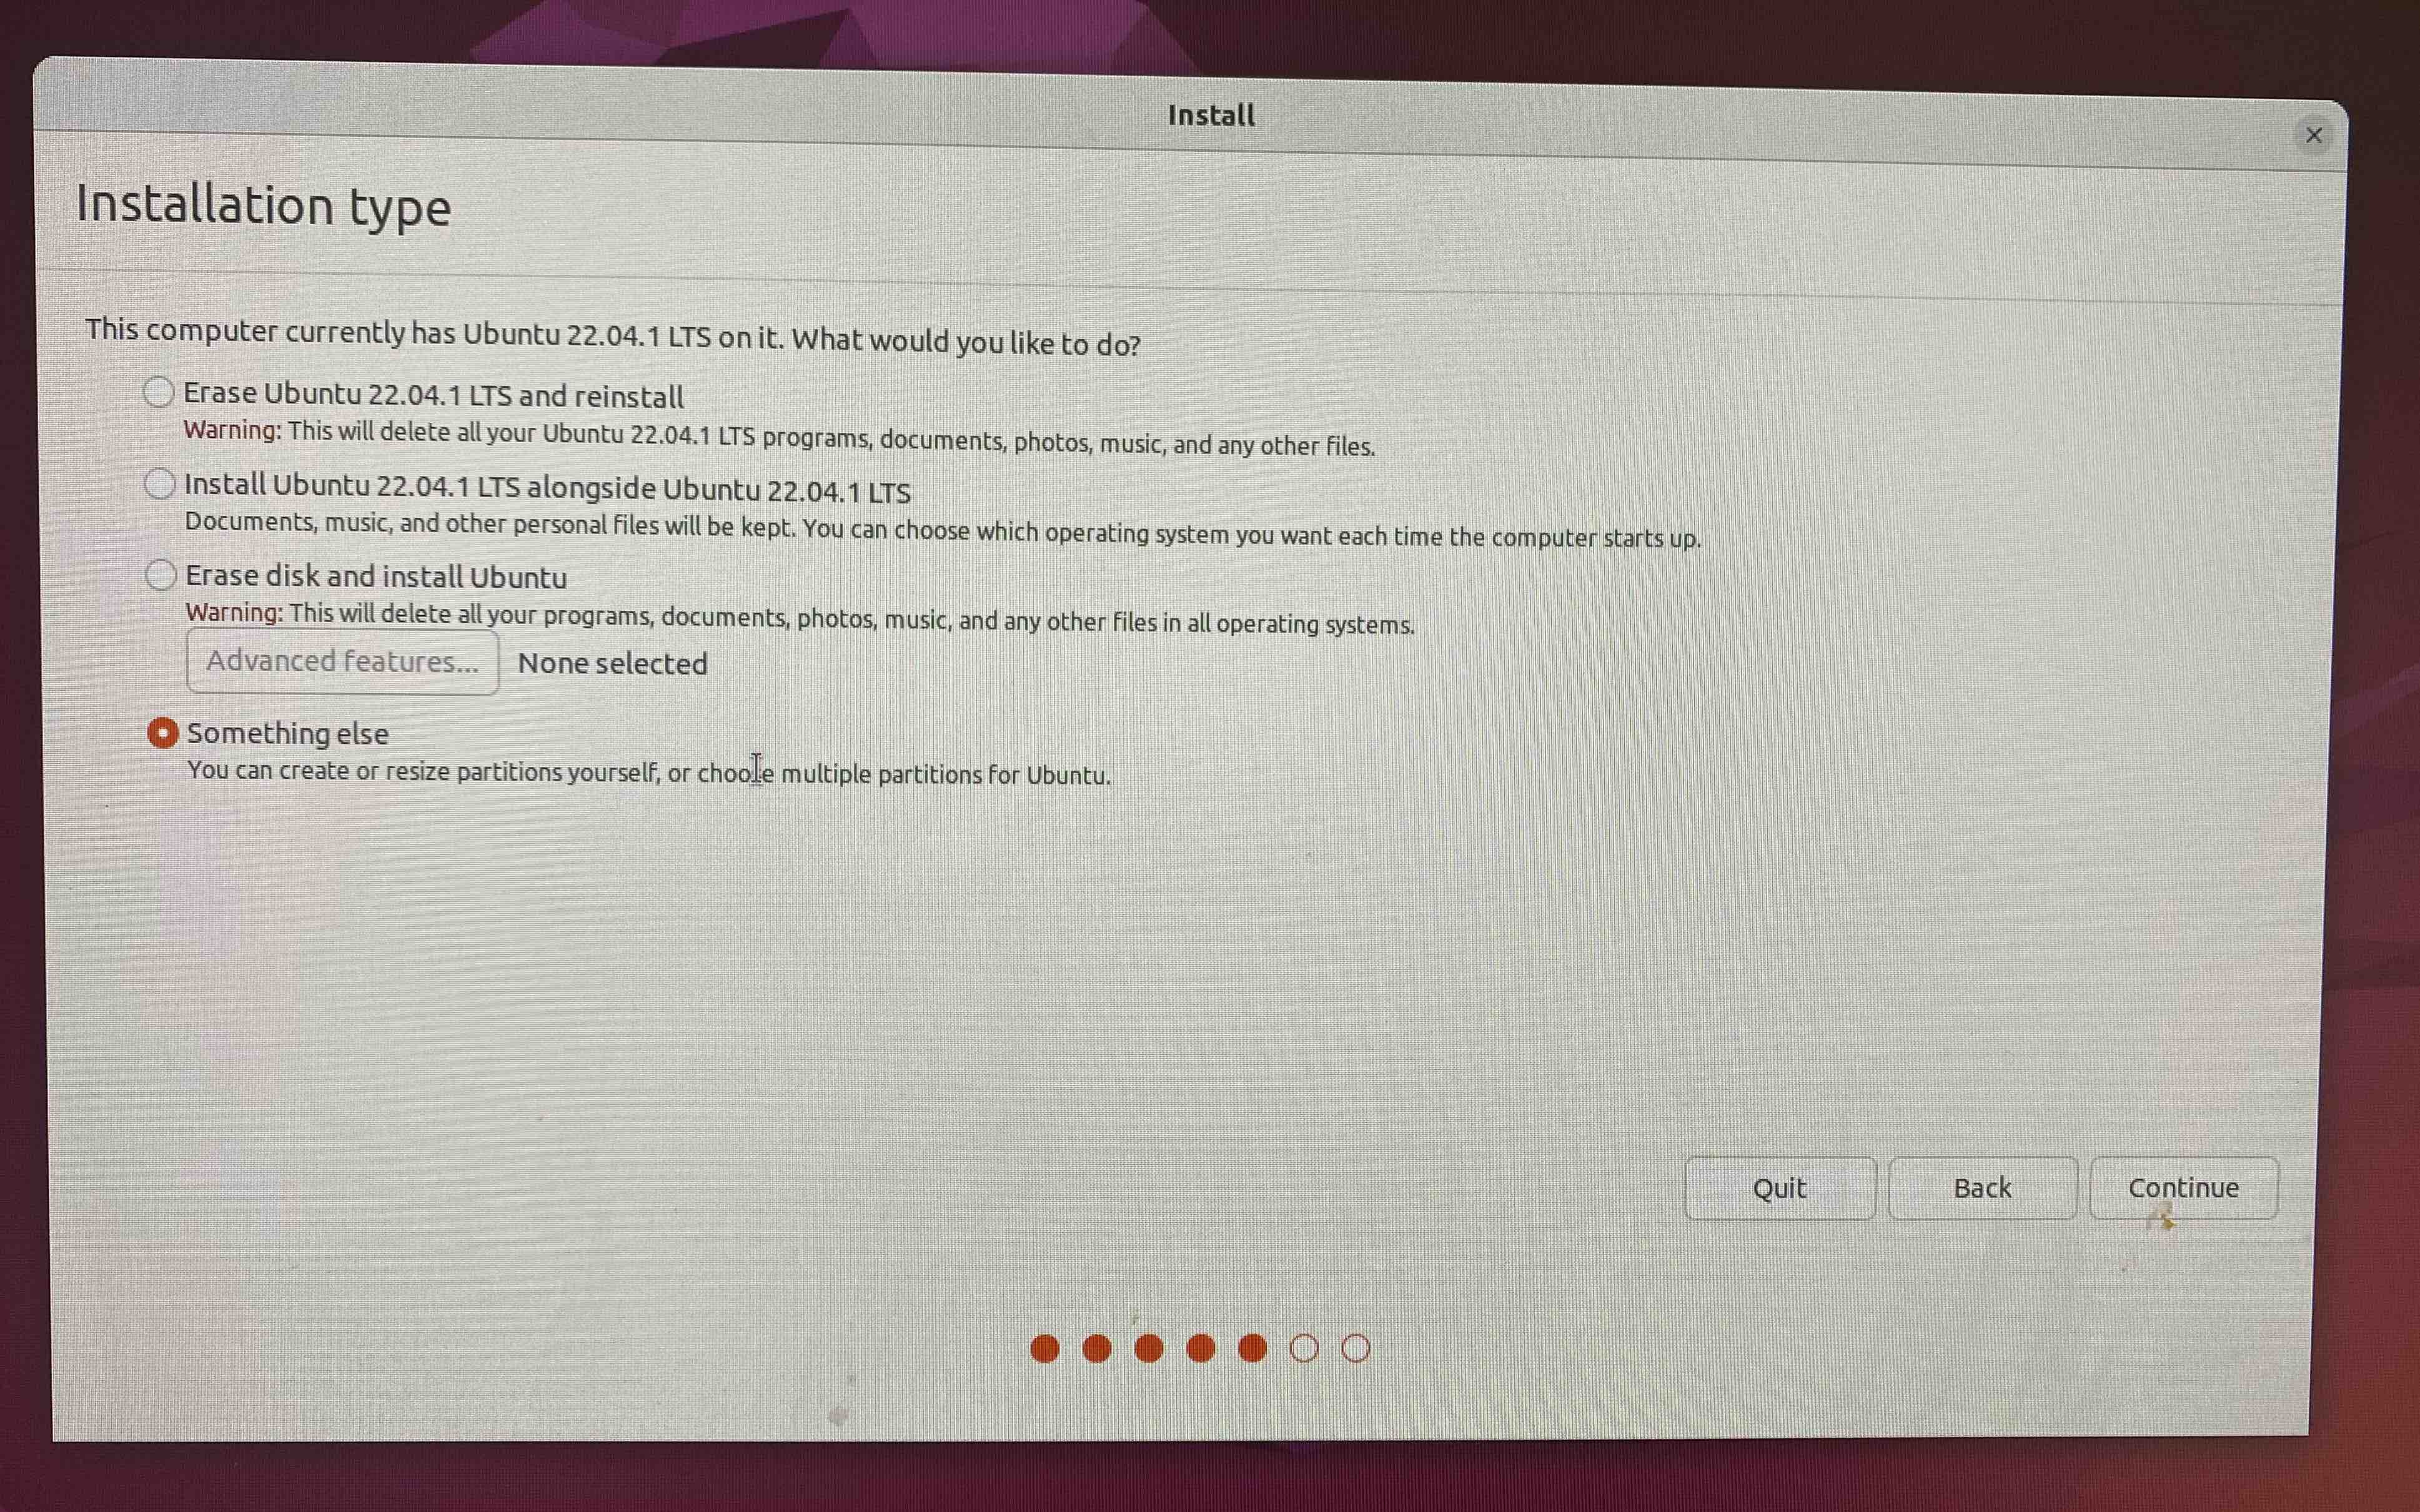
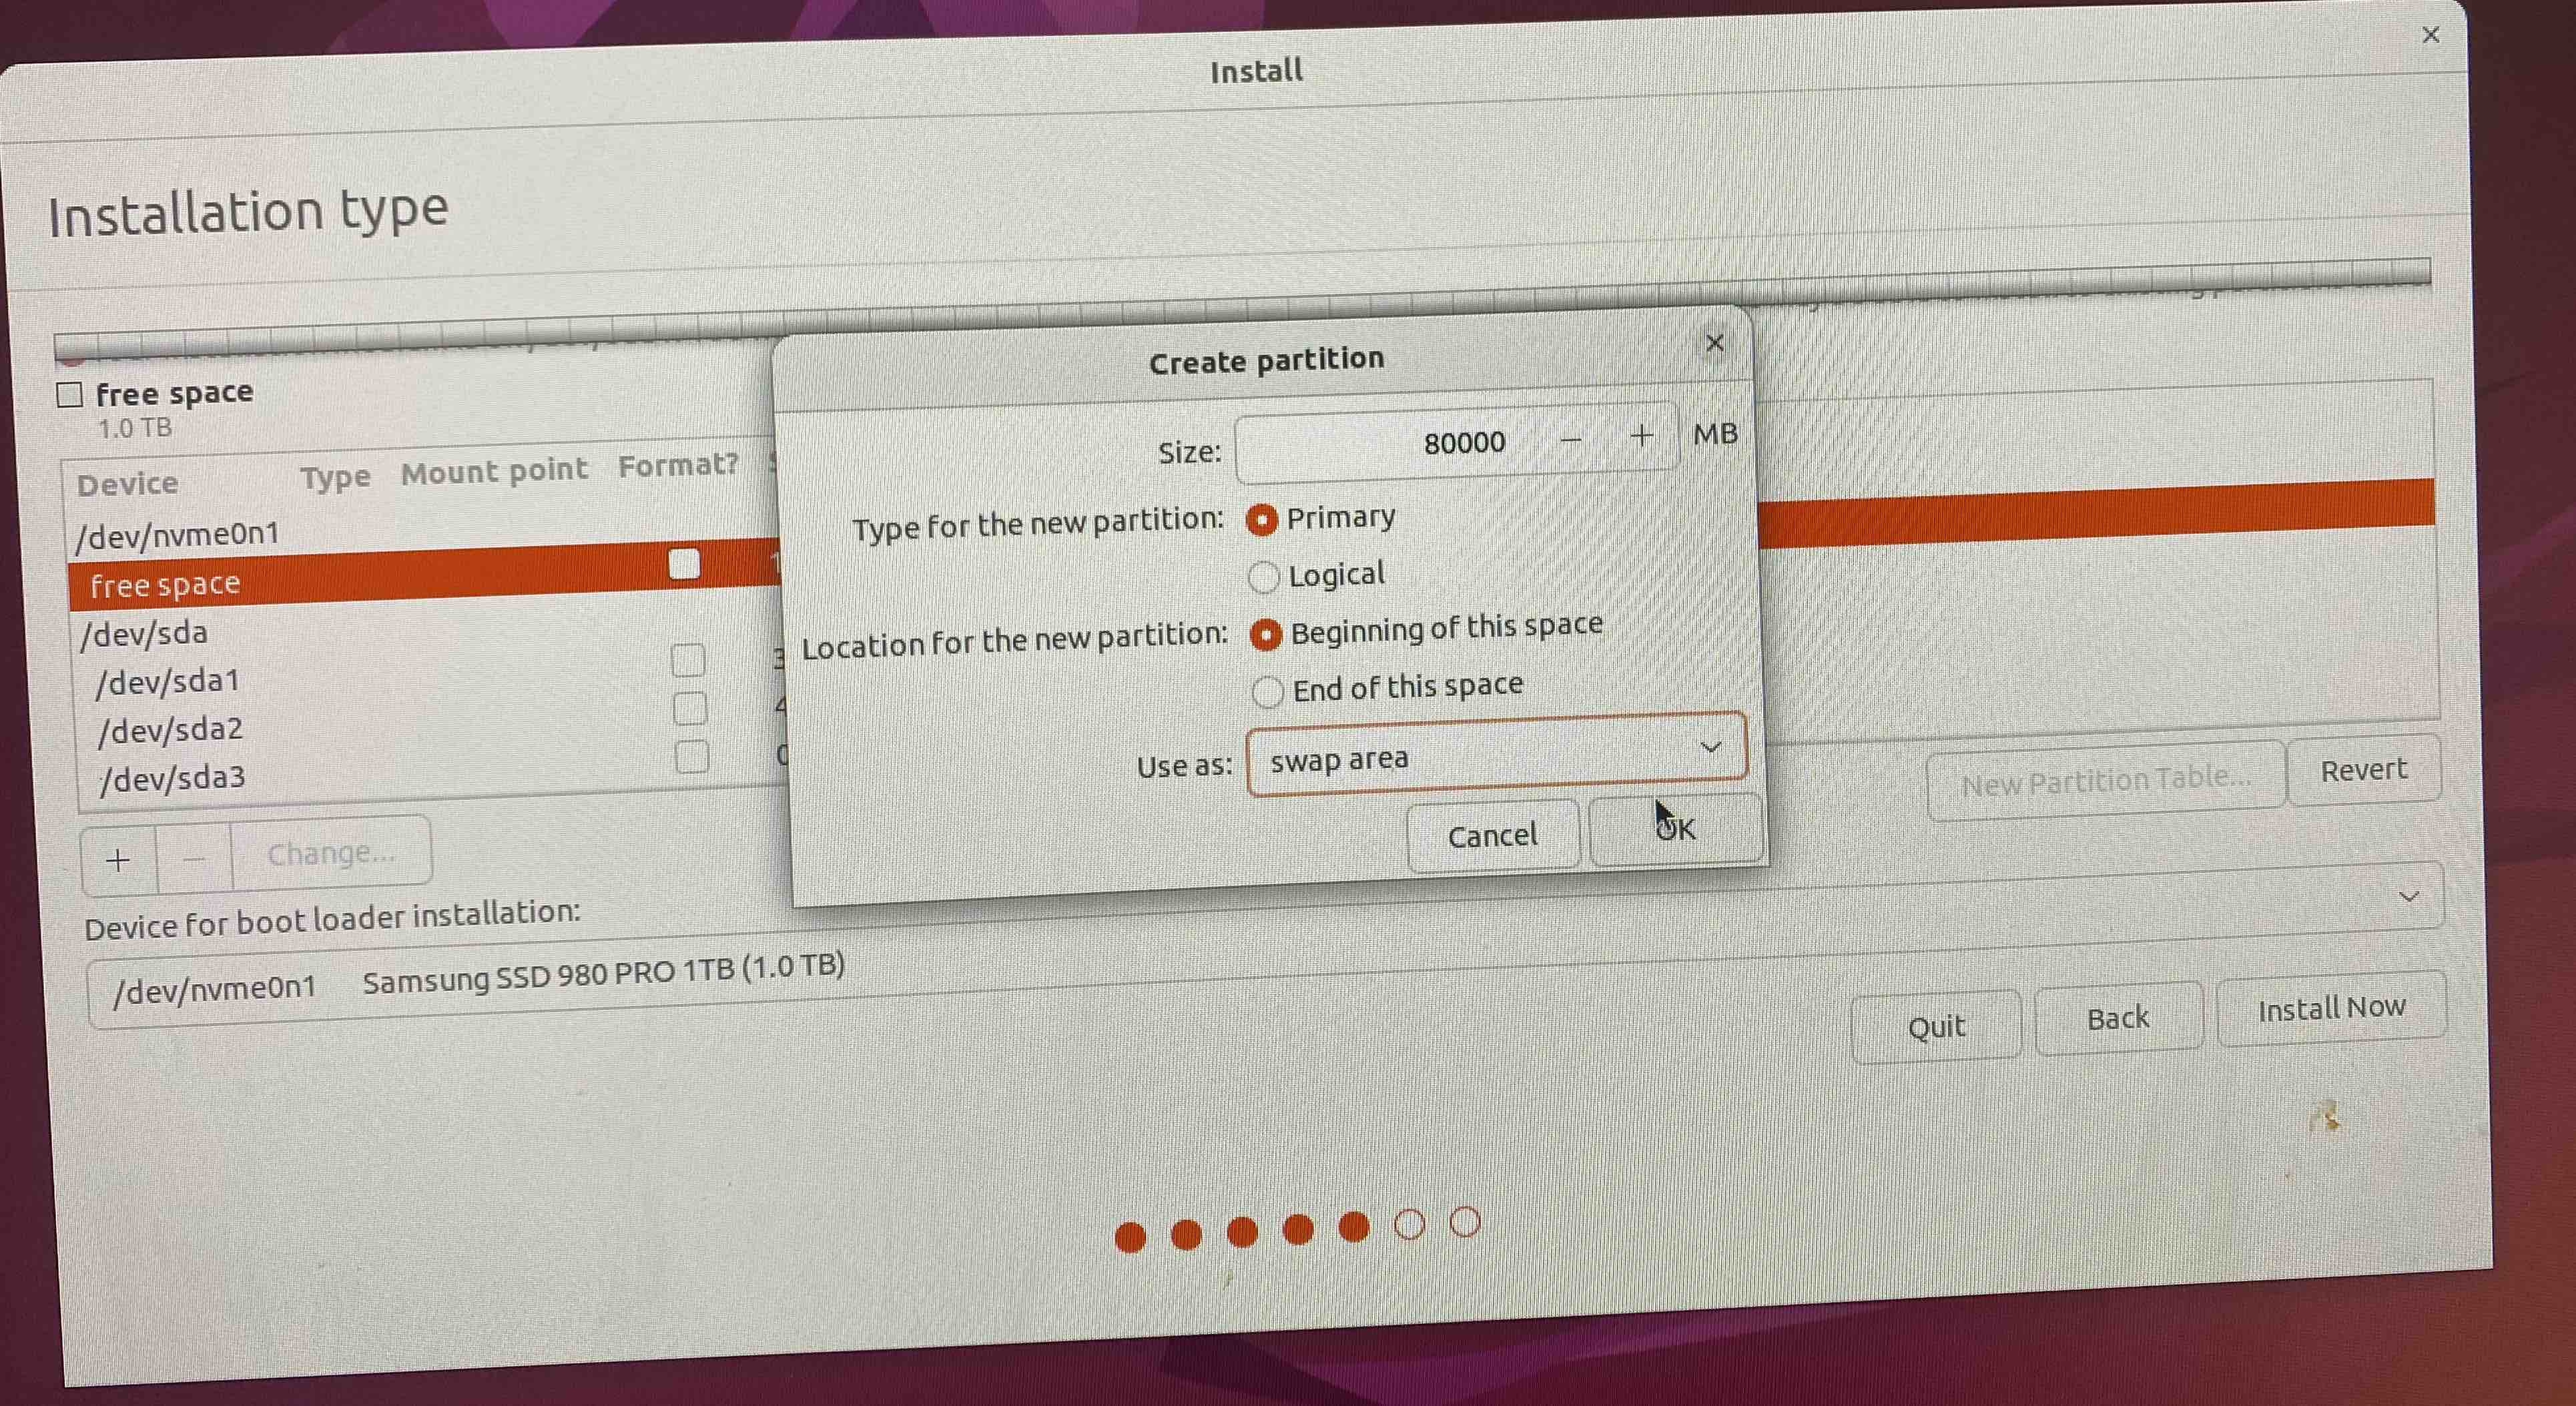
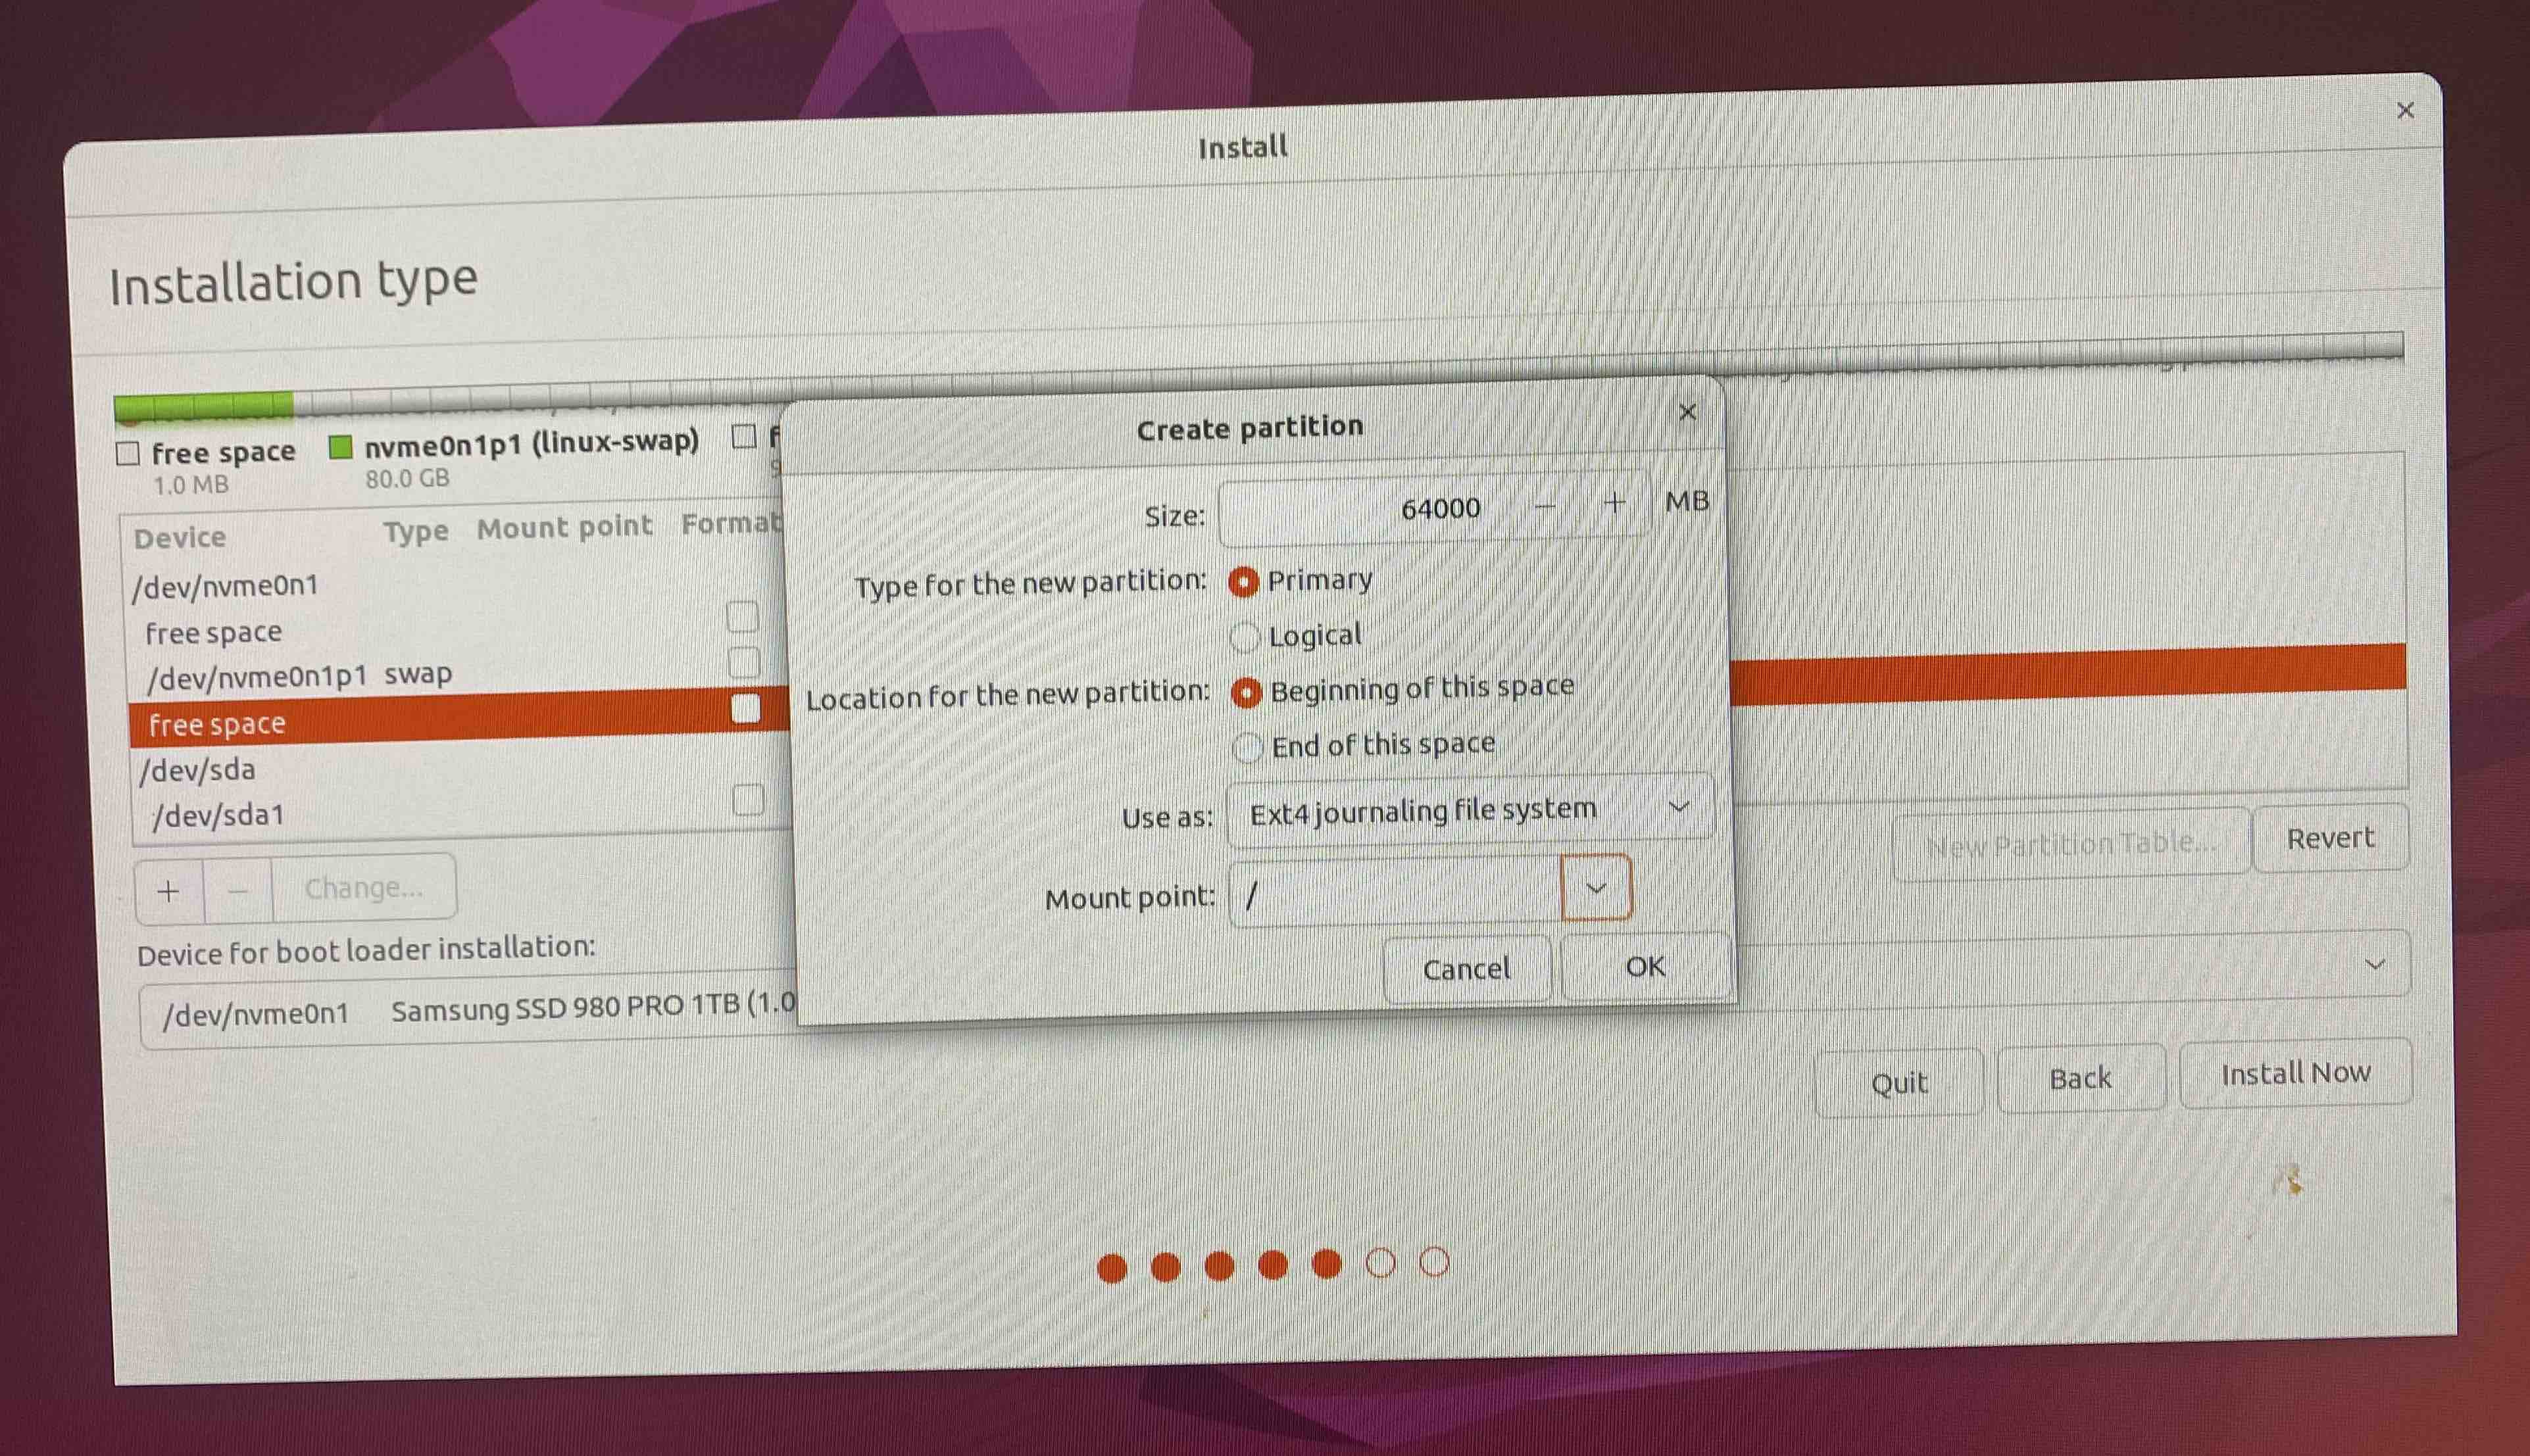
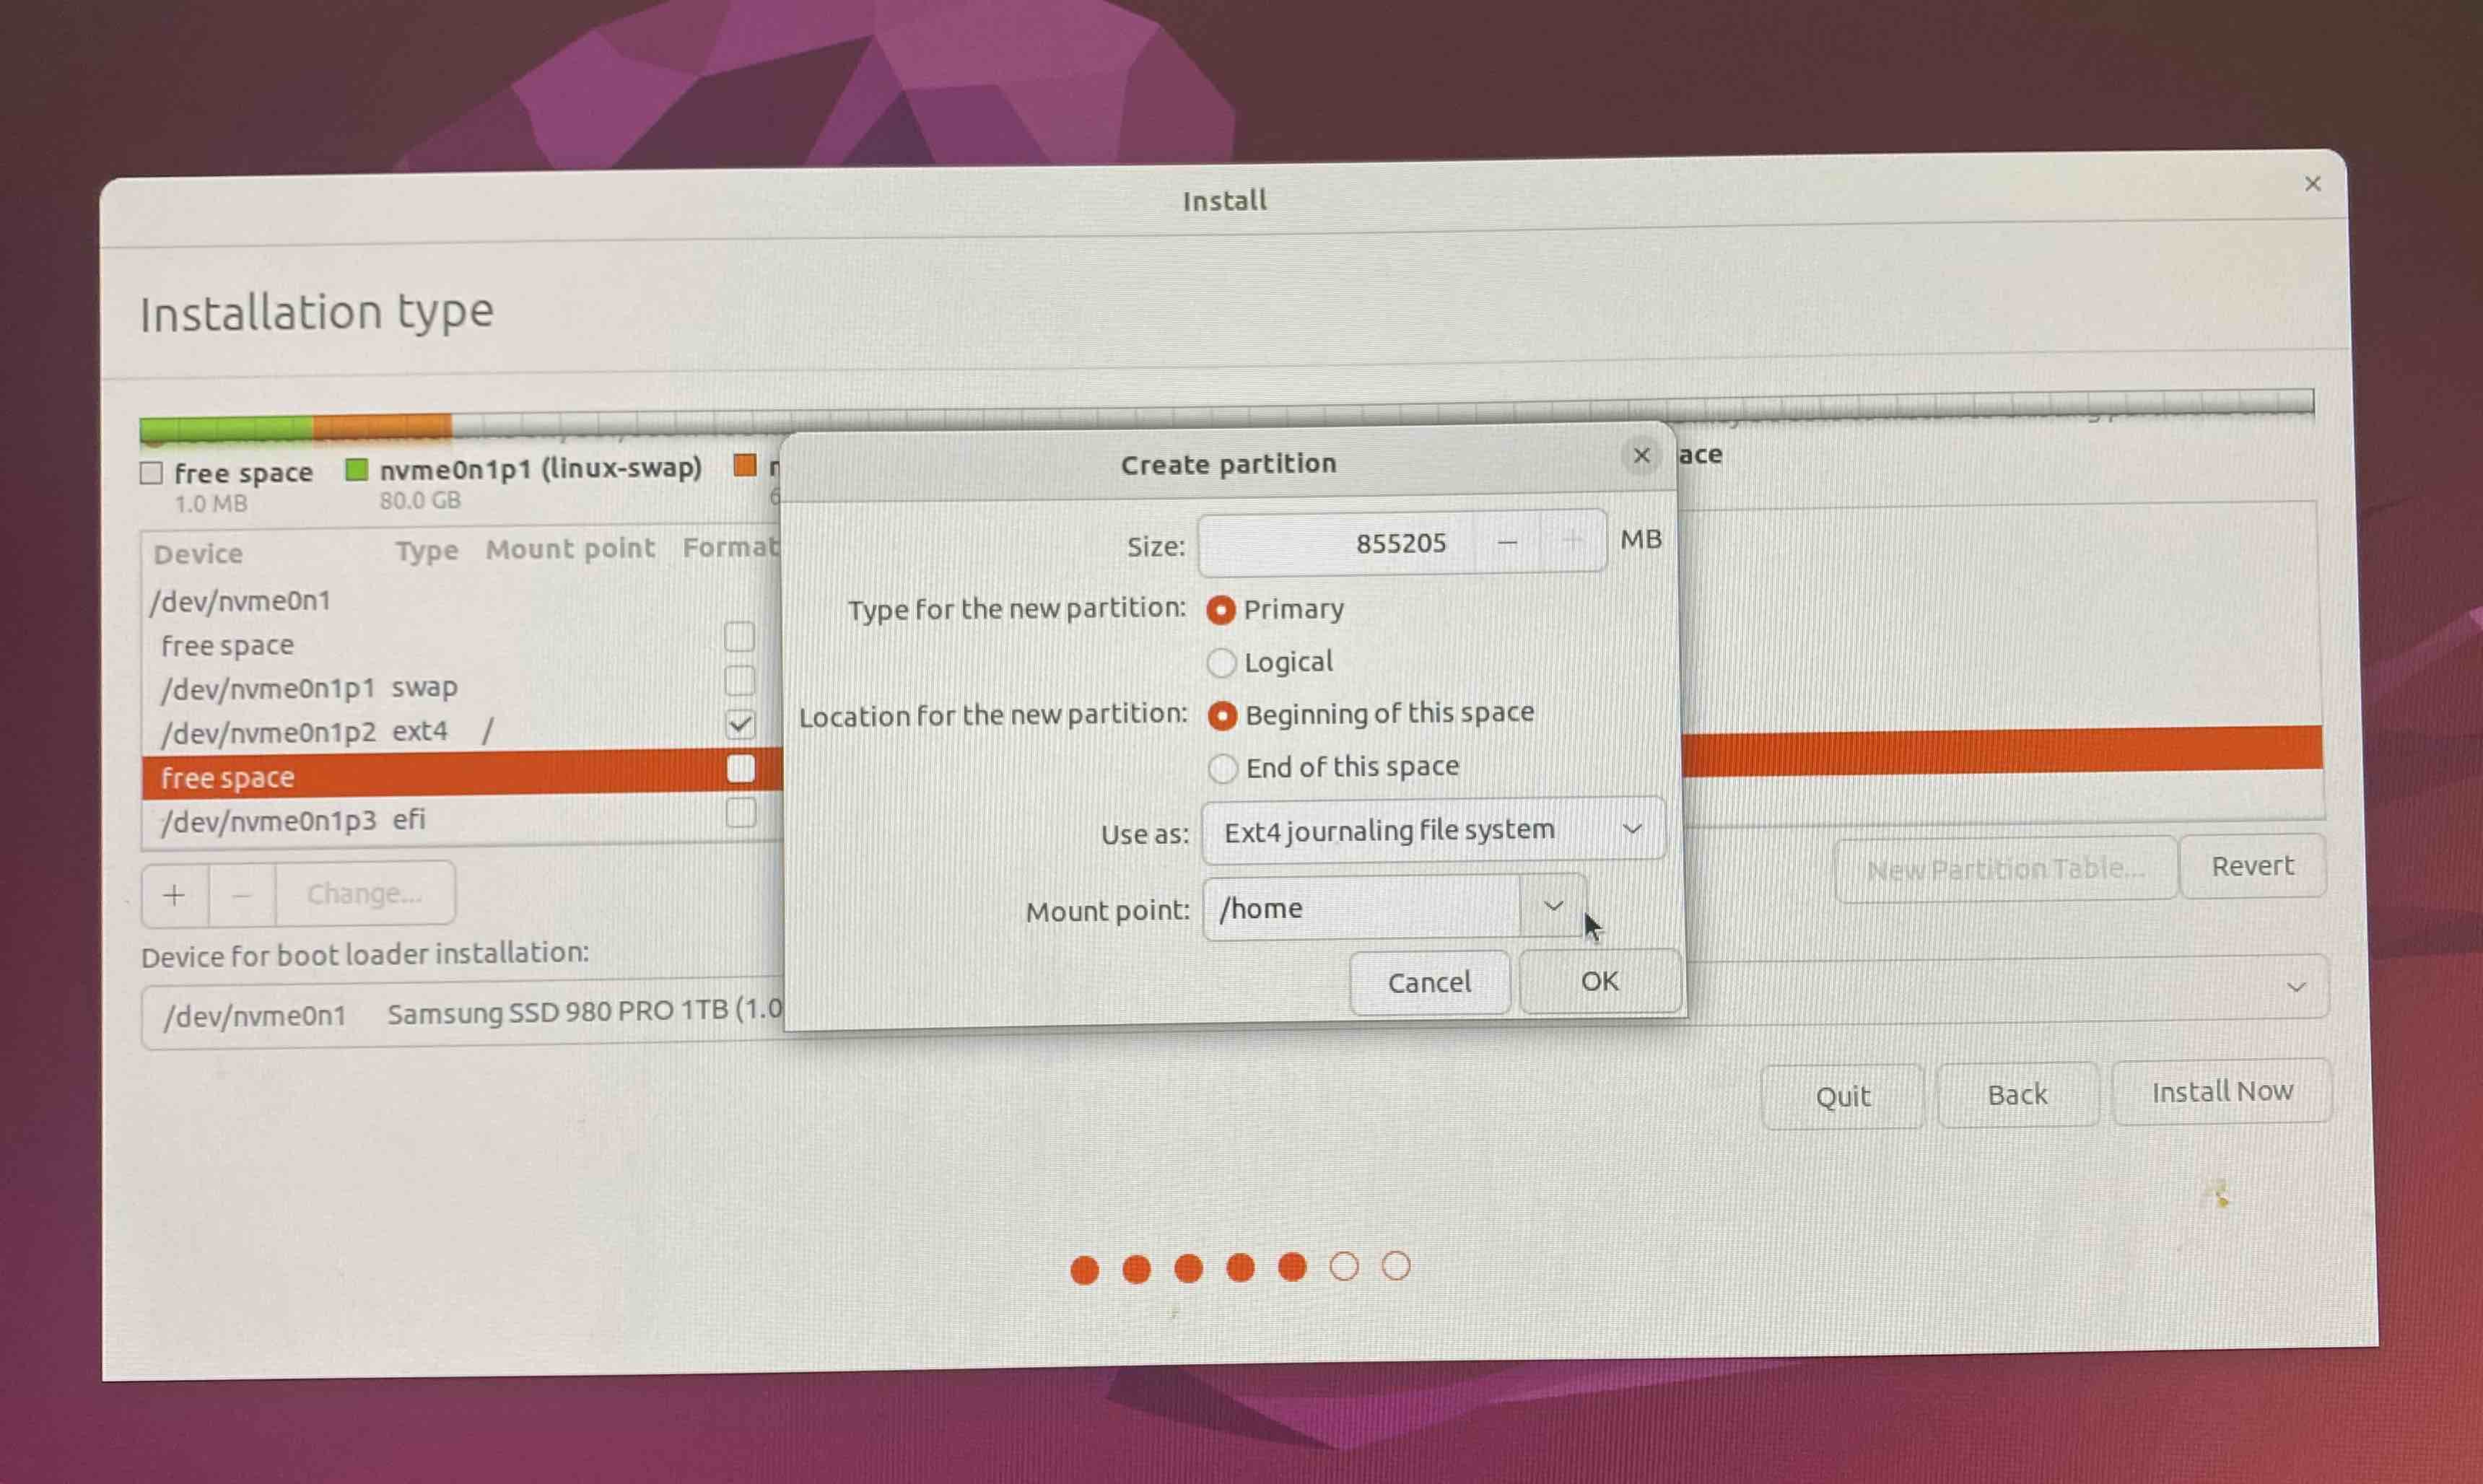
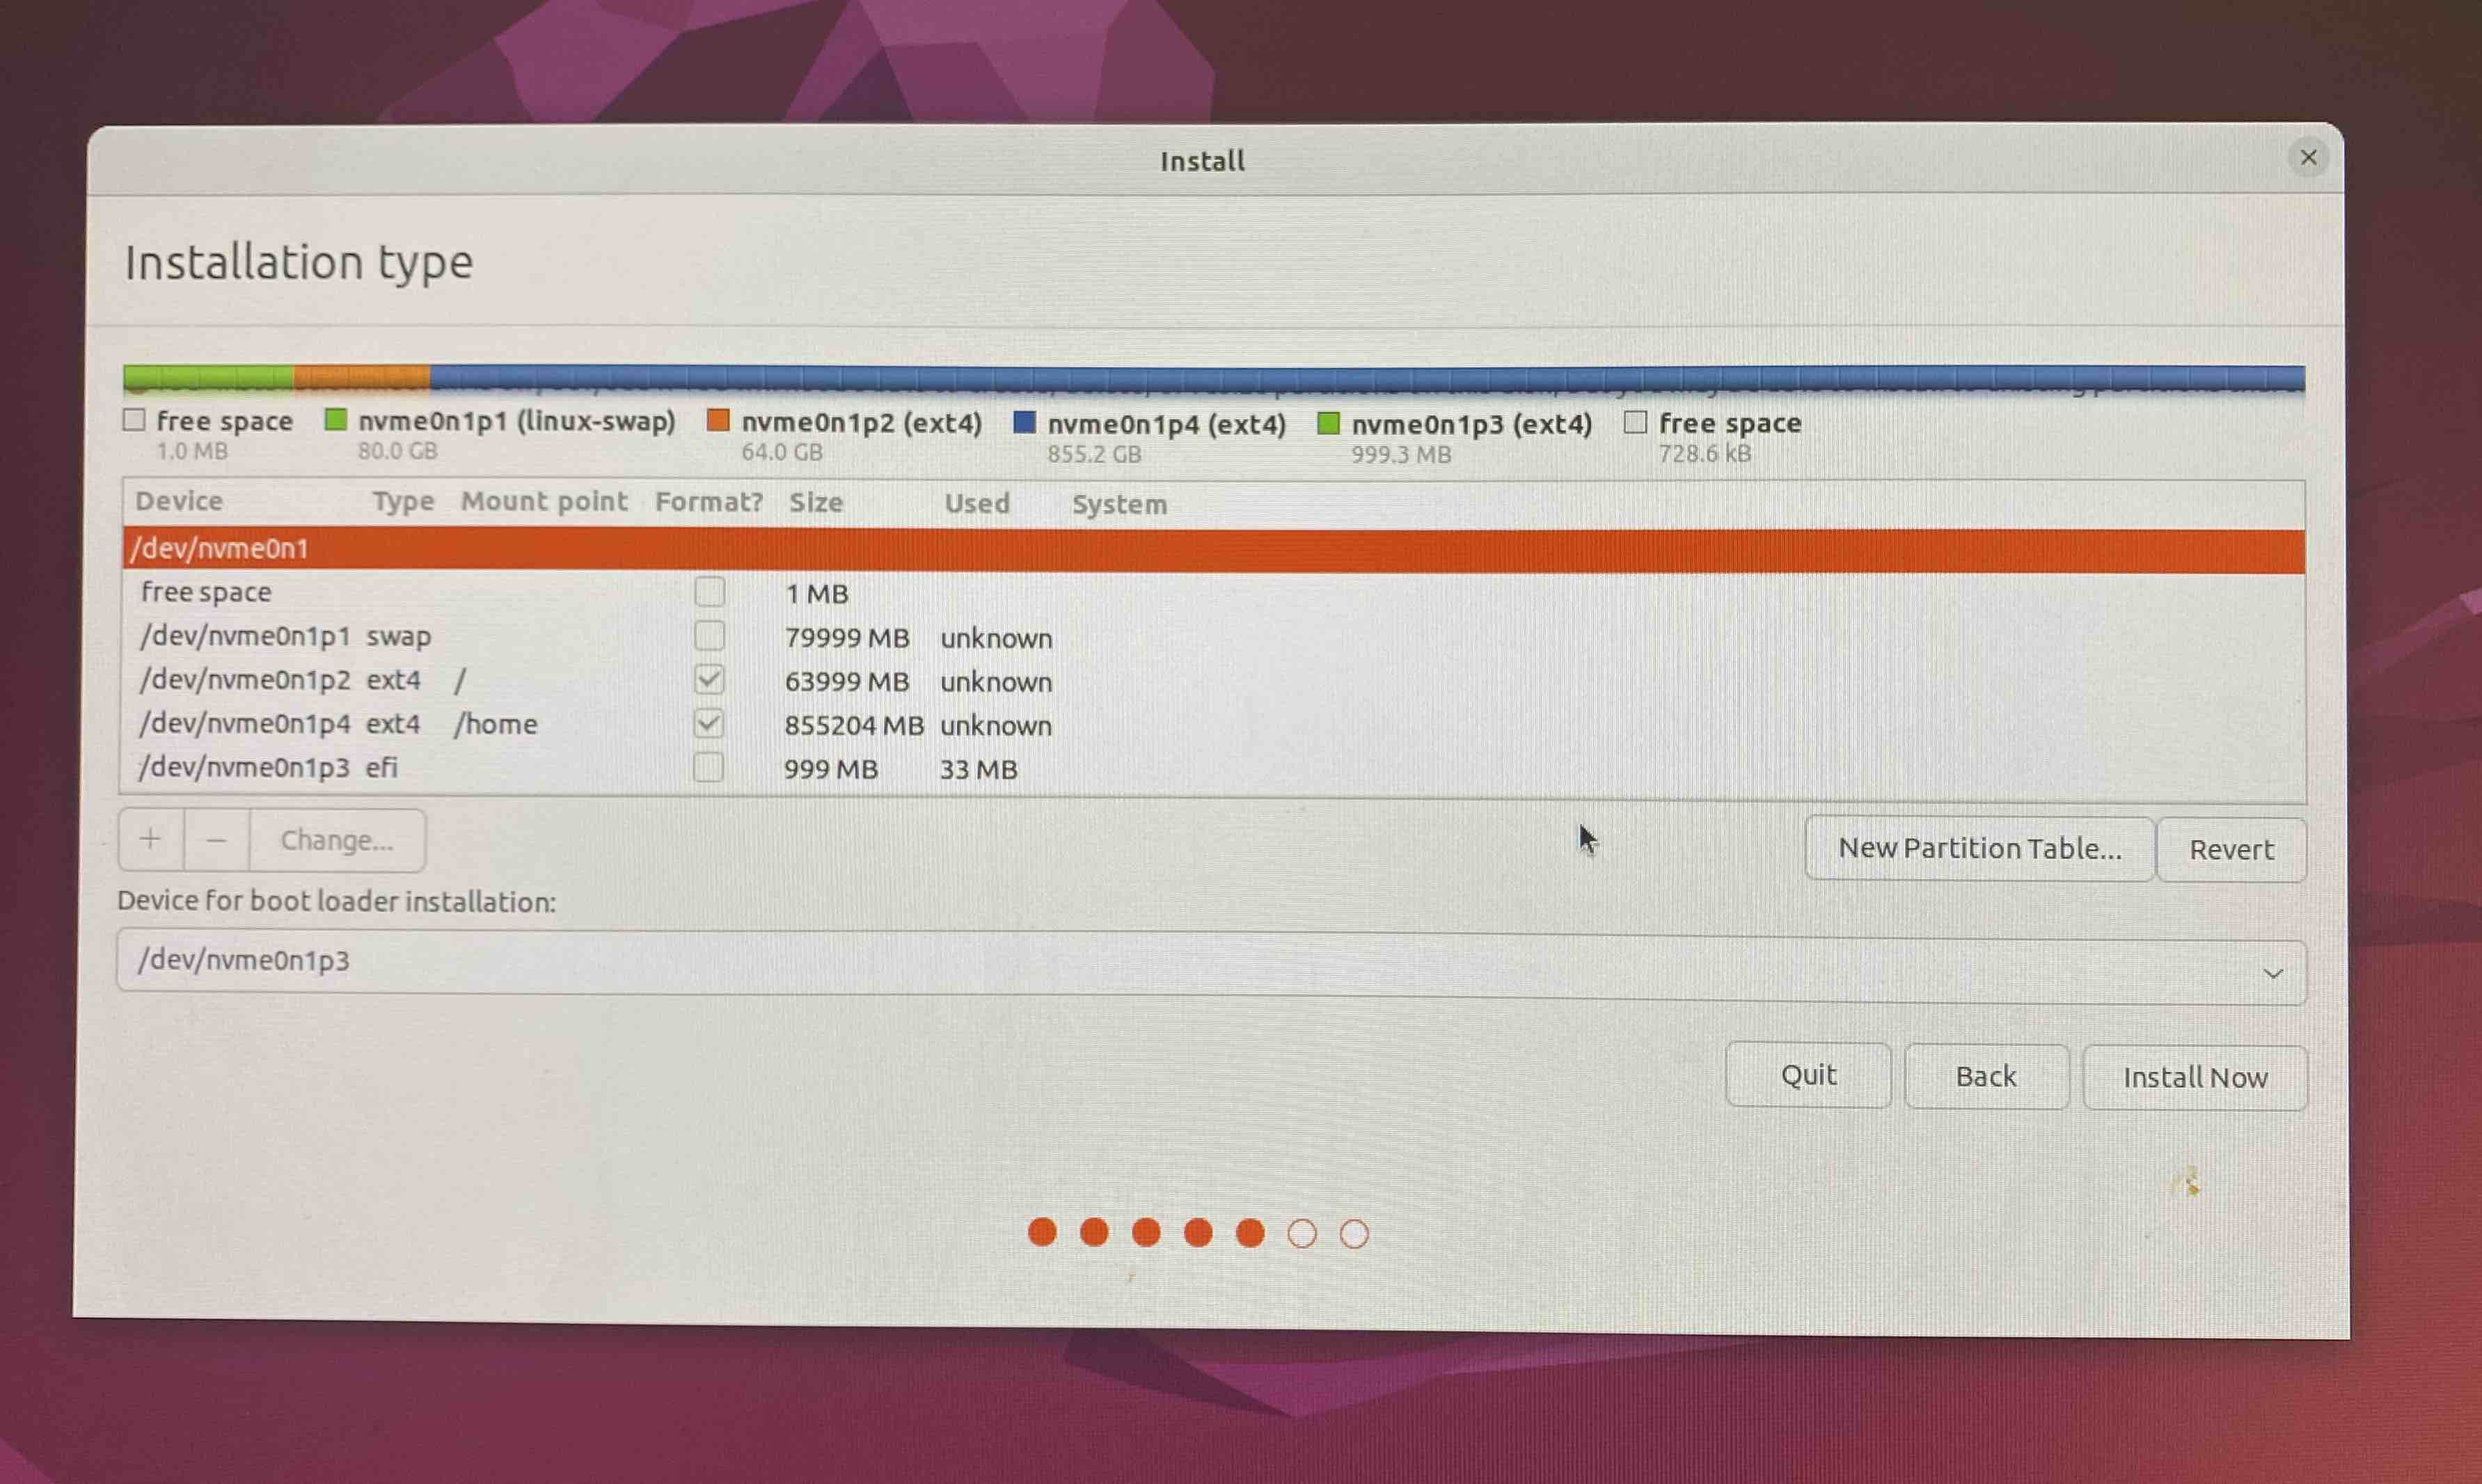
- Step 4: Partitio the hard-drive (caution: this step may delete all your existing)
| Partition for Swap-area | Partition for root (/) |
 |
 |
Parttion for /boot |
Partition for /home |
 |
 |
The swap-area should be at least as large as your RAM memory to be able to hibernate the system. Typically, choosing 10-20GB is enough for root /, but I decided to go with 64GB.
Notice that I first chose /boot parttion before /home, but I selected End of this space to put the /boot partition at the end.
Select the proper partition for installation of boot-loader:
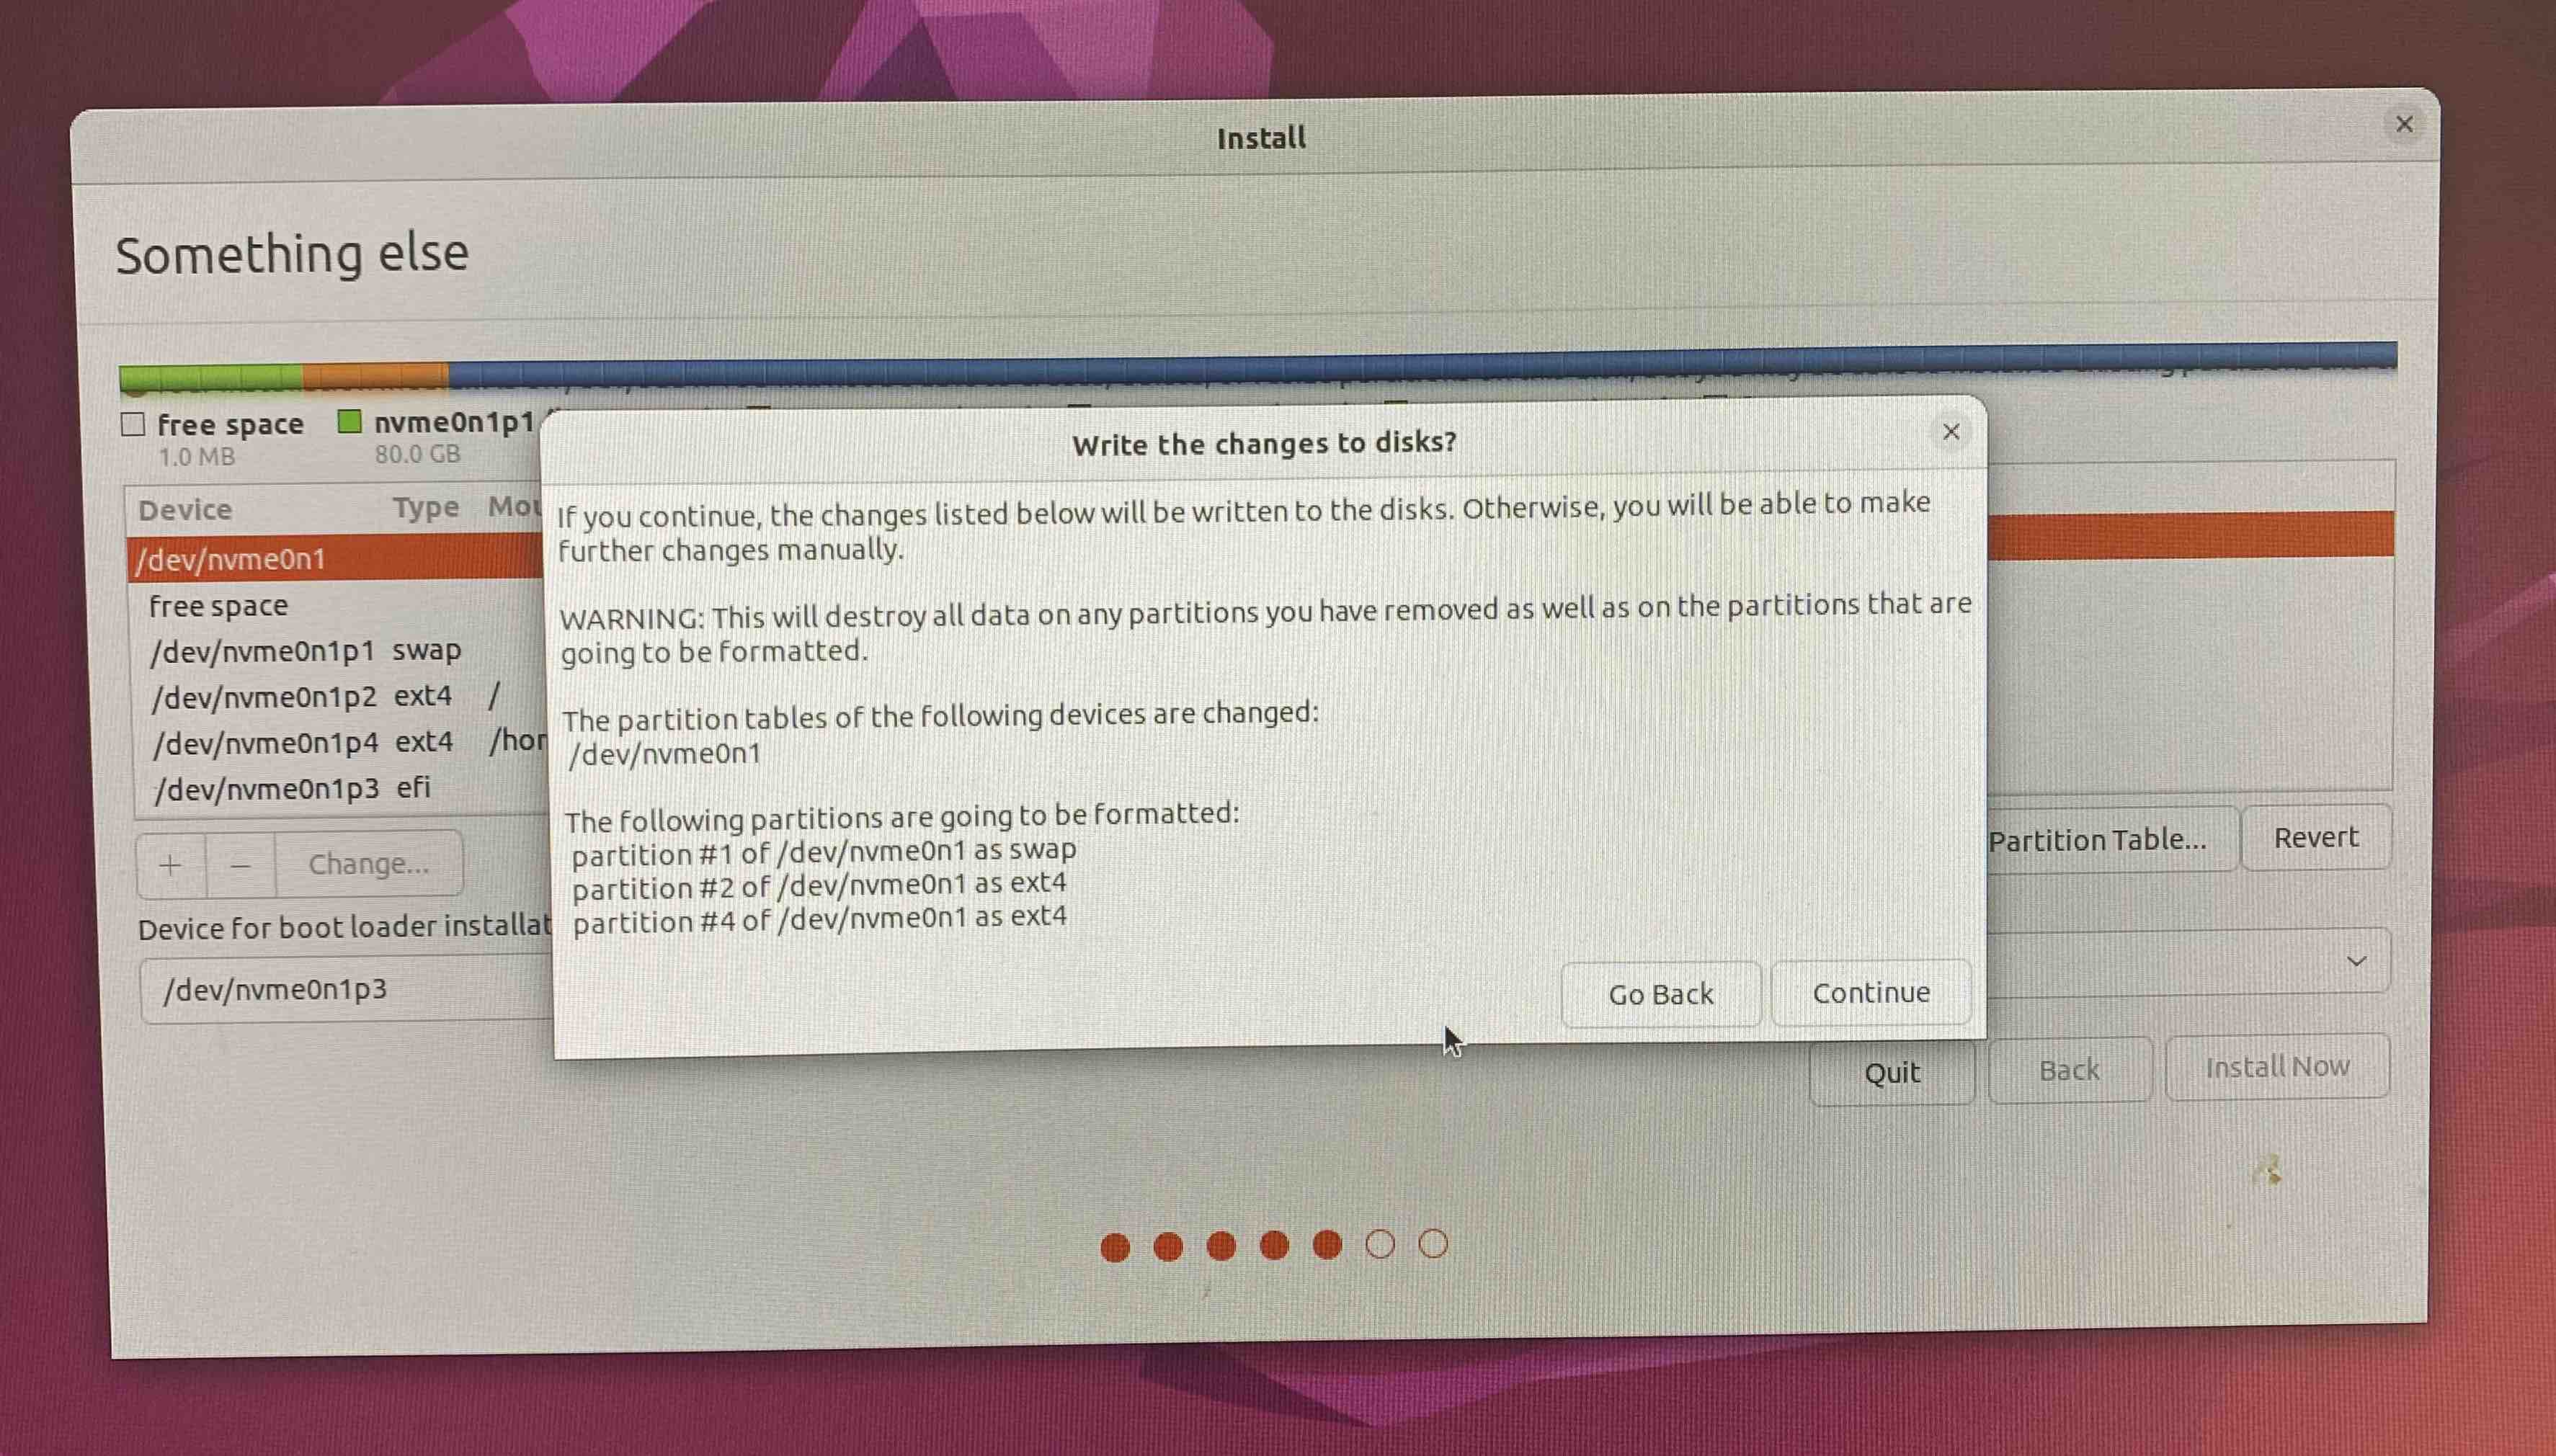
Final confirmation:
(caution: pressing Continue is irreversible!)
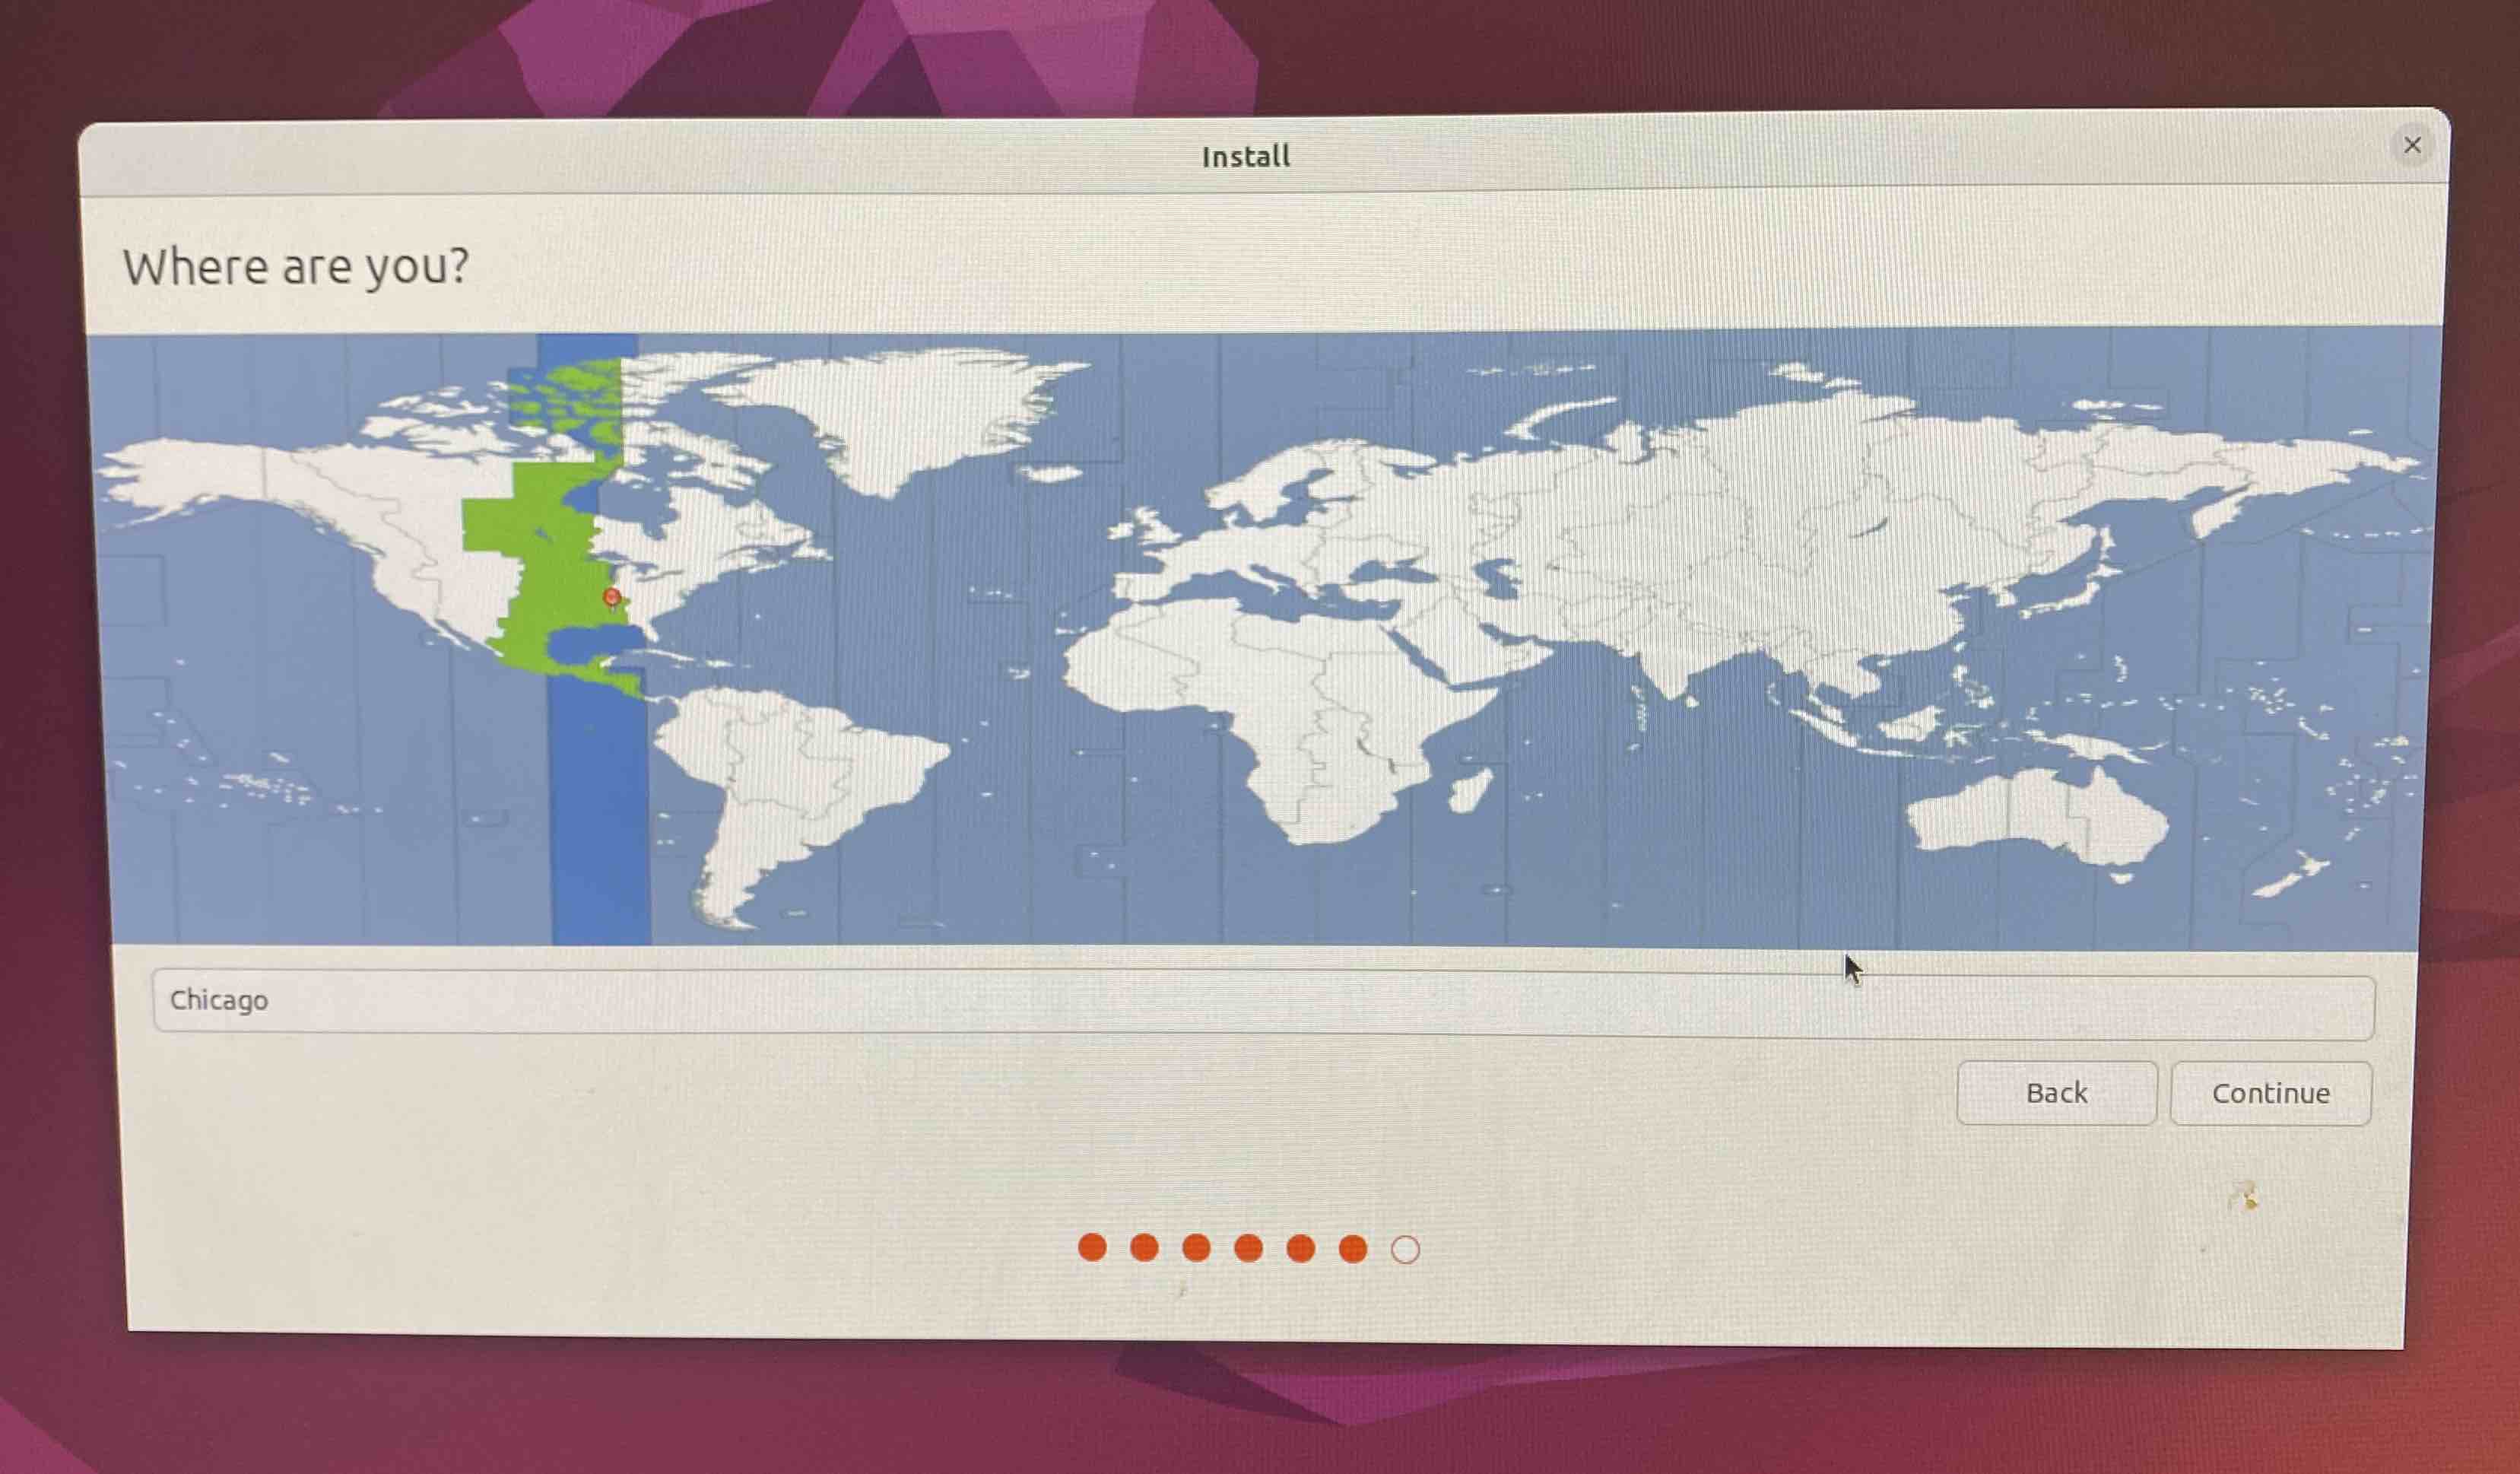
- Step 5: Select time region
- Step 6: Choose a computer name and a username and set password

*. Step 7: Finished, reboot your computer
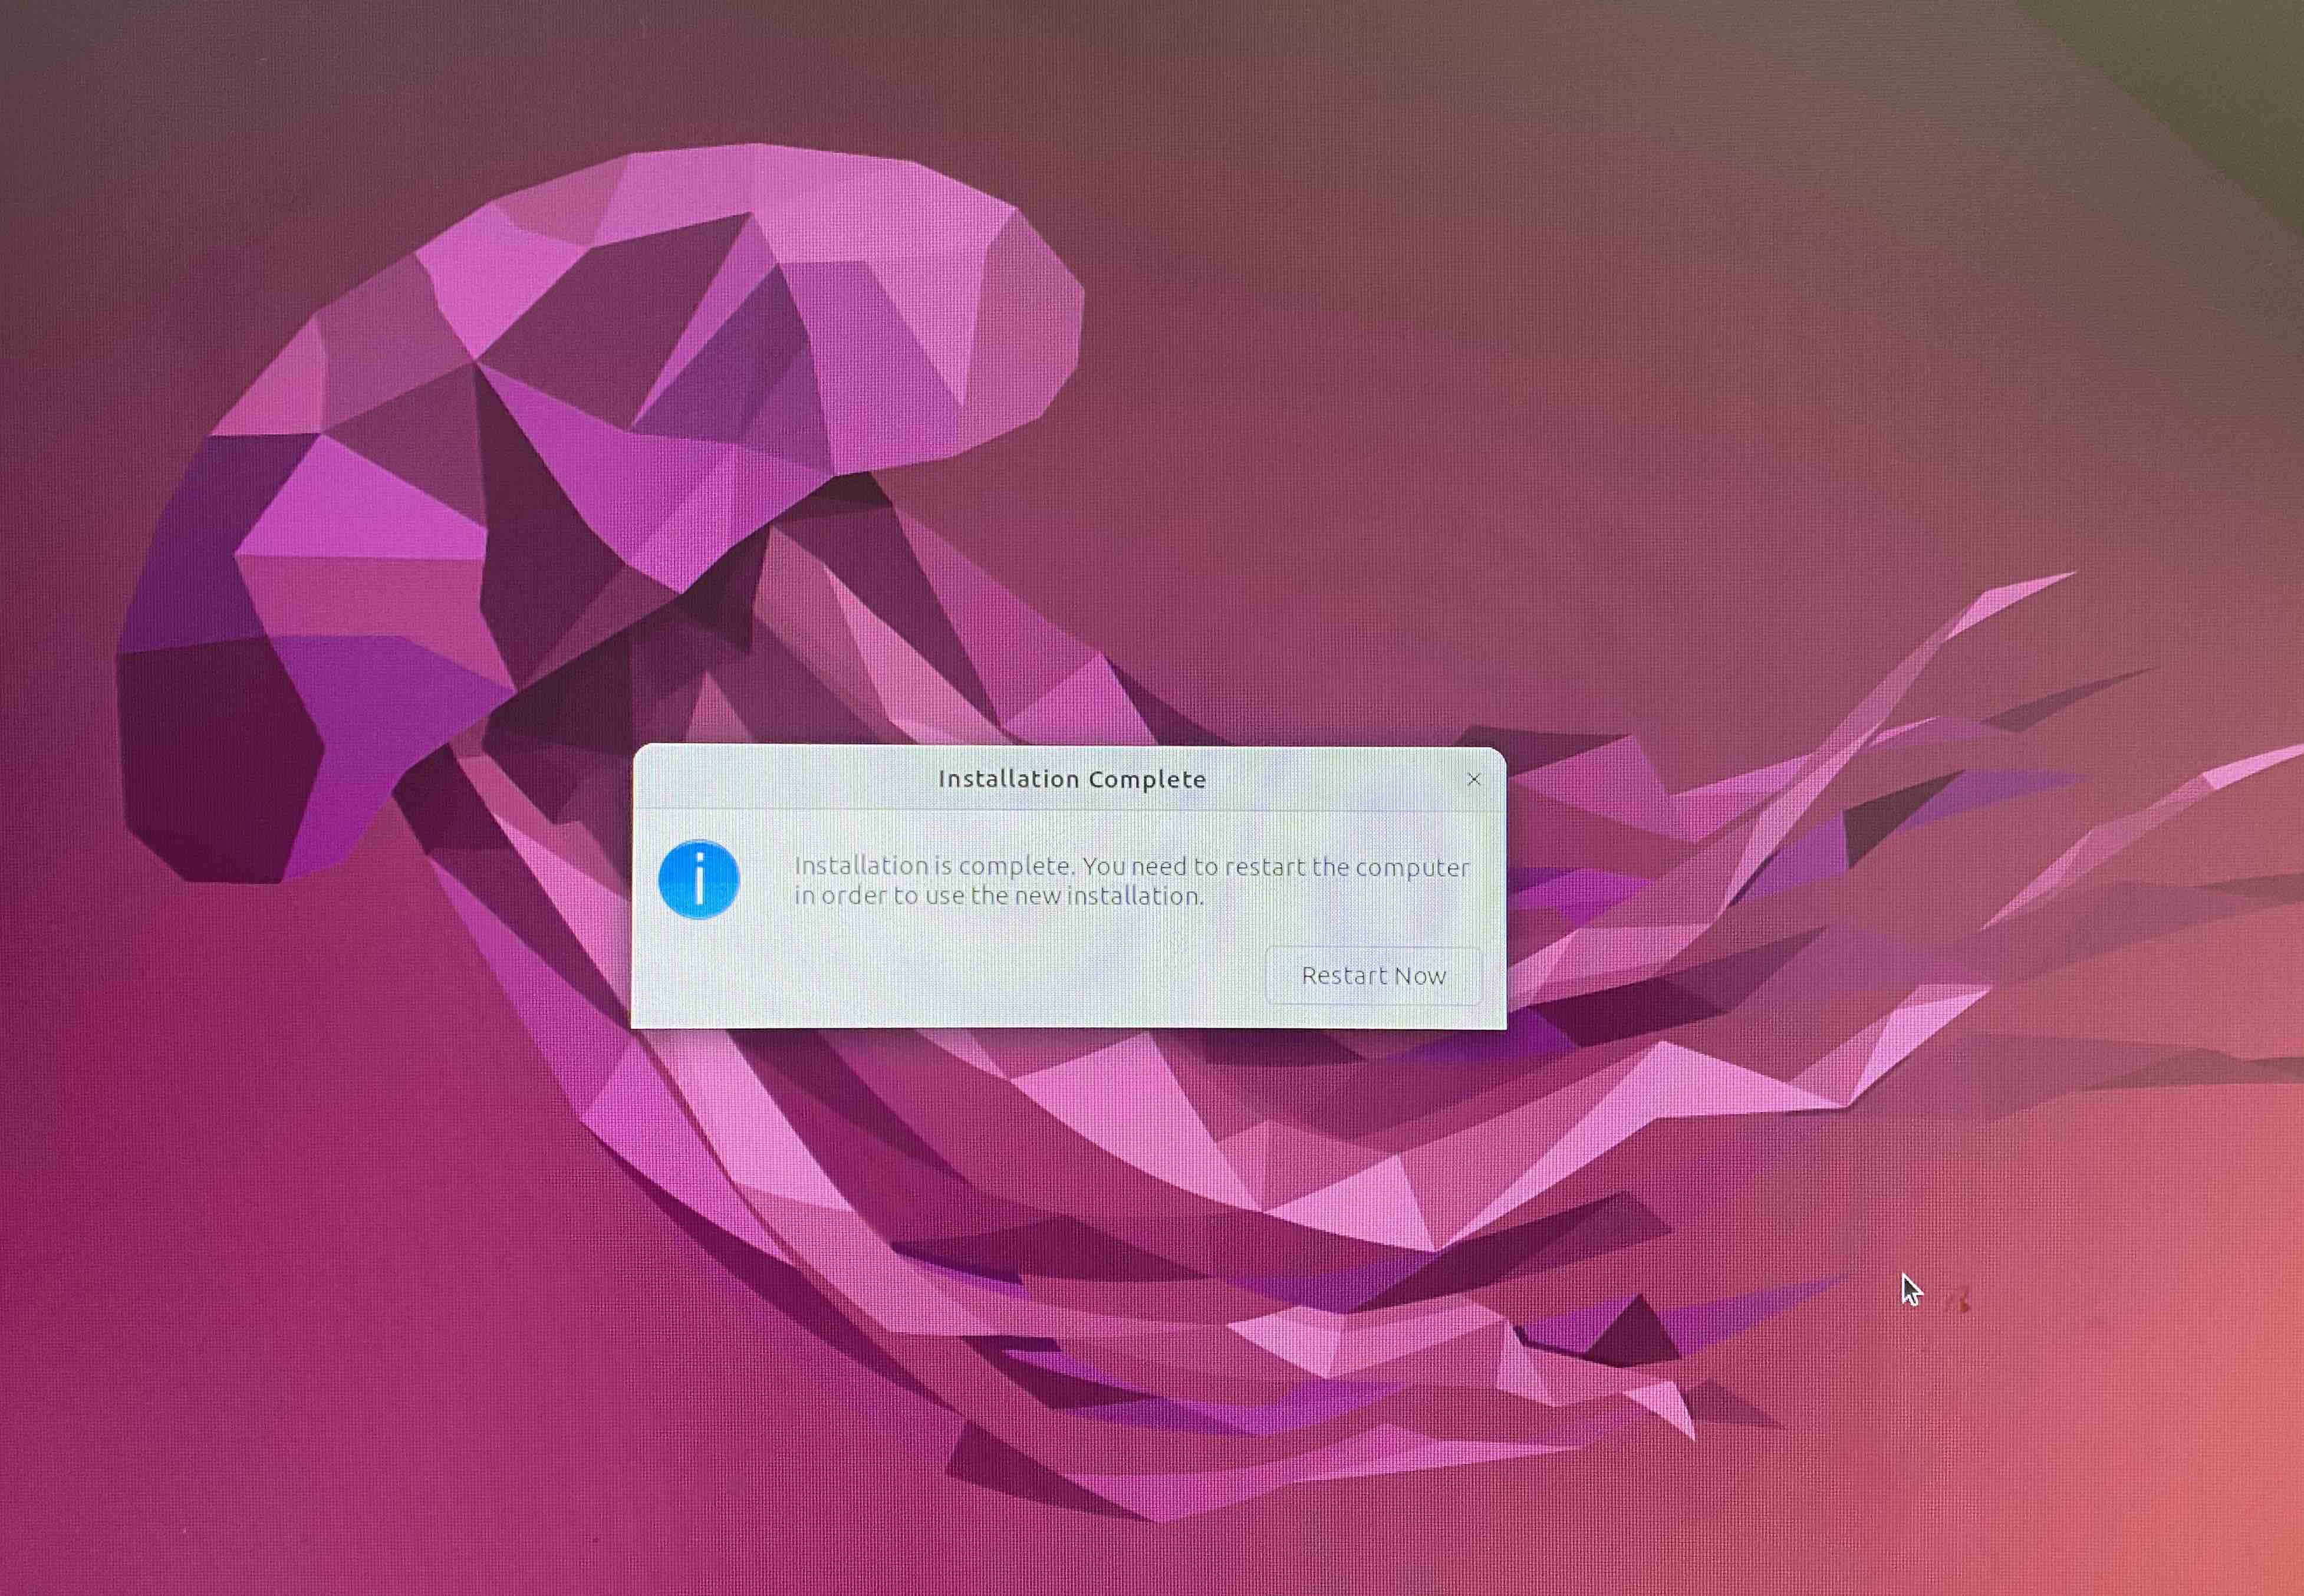
Congratulations! Now you have a fresh Ubutu installation. Reboot the system.
Installing useful tools
We now have a fresh installation of the Ubuntu operating system, and the next step is to install some necessary tools and software. However, before proceeding with any additional installations, we should first update Ubuntu’s package manager (apt) using the following command:
- update
1
sudo apt-get update
Ths will retrieve the latest version information for all packages installed on the system.
- adding some useful alias commands to
~/.bashrc
Next, I make some aliases in bash that would promot me for confirmation before overwriting or deleting some existing files.
1
2
3
alias cp='cp -i'
alias mv='mv -i'
alias rm='rm -i'
- install
vim
VIM is a versatile command-line text editor, well-suited for use in terminal environments. We can install vim using Ubuntu’s package manaer as follows:
1
sudo apt install vim
- configure vim to re-open a file to its last curser position This is a very useful feature, allowing you to re-open a file and jump directly to the line that you visited last time you openned that file. Otherwise, it will re-open the file from the begnning.
Open file /etc/vim/vimrc using vim and search for reopen and uncomment the line as shown below.
1
2
3
 " Uncomment the following to have Vim jump to the last position when
" reopening a file
au BufReadPost * if line("'\"") > 1 && line("'\"") <= line("$") | exe "normal! g'\"" | endif
- configure terminal to browse previous history by arrow-keys
This feature is very useful for navigating through the commands in the terminal, allowing you to browse through previous history of commands. For example, if you have previous ran a python main.py ..., you can type py and then press upper arrow key to go through your previous commands that starts with py.
To enable this feature, simply create a new file ~/.inputrc and add the following content to it:
1
2
3
4
"\e[A": history-search-backward
"\e[B": history-search-forward
"\e[C": forward-char
"\e[D": backward-char
- install
tmux
tmux is a terminal multiplexer that allows you to run multiple terminal sessions within a single window. We can install tmux using Ubuntu’s package manaer as follows:
1
sudo apt install tmux
- configure tmux to have colored command-prompt
1
2
# filename: ~/.tmux.conf
set -g default-terminal "screen-256color"
- download script for saving and restoring previous sessions
1
wget https://raw.githubusercontent.com/mislav/dotfiles/d2af5900fce38238d1202aa43e7332b20add6205/bin/tmux-session
This script allows you to save you session before restarting your computer by running bash ~/tmux-session save and then later restoring the sessions after the restart: bash ~/tmux-sesson restore.
- (Optional) Enable remote access via ssh over local netwoek
This step will enable you to securely log in to your Ubuntu machine remotely from other machines on the same network, using an SSH client.
- Install OpenSSH-server
1
sudo apt install openssh-server
- Check to make sure SSH service is running:
1
sudo systemctl status ssh
- Get the IP address of the Ubuntu machine in the local network:
1
ip a
In the output of the command above, look for a line that starts with inet . The IP address is shown in that line. Then, you can login remotely using your other machine:
1
ssh username@ip_address
- Setup password-less entry with ssh-key
On your other machine, run the followig commands. Follow the prompts from ssh-keygen, and choose proper name for the file. Here we just assume the name of the ssh-key file is something:
1
2
3
4
5
6
7
8
cd ~/.ssh/
ssh-keygen -t rsa

# copy the public key to the Ubuntu machine
scp something.pub username@ip_address:/home/username/

# activate the key:
ssh-add ~/.ssh/something
On the Ubuntu machine, copy the content of the public key you generated above (it is named something.pub) to ~/.ssh/authorized_keys file. If the folder ~/.ssh/ or the file ~/.ssh/authorized_keys don’t exist, create them.
1
2
3
4
# assume something.pub is the public key that is copied with
# scp command to the Ubuntu machine
mkdir -p ~/.ssh/
cat ~/something.pub >> ~/.ssh/authorized_keys
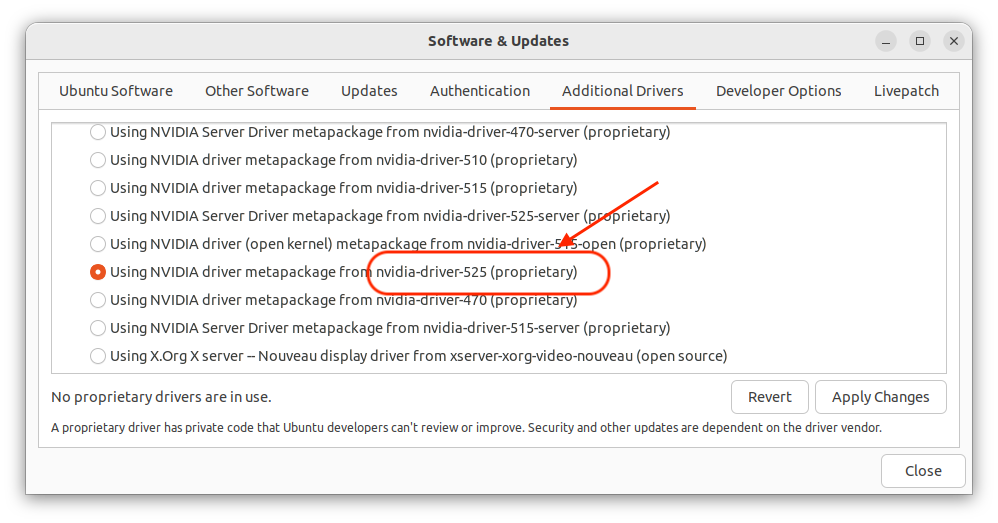
Installing NVIDIA driver
Now, we are ready to install NVIDIA driver to be able to use the GPU for efficiently training deep-learning models.
To install NVIDIA-driver, we can use either the graphic user-interface of Ubuntu (The Additional Drivers tab in Softwares & Updates) or the terminal to search for nvidia-drivers using sudo apt search nvidia-driver and then install the latest version (e.g. by sudo apt install nvidia-driver-525).
| Using Graphic Interface | Using the terminal |
 |
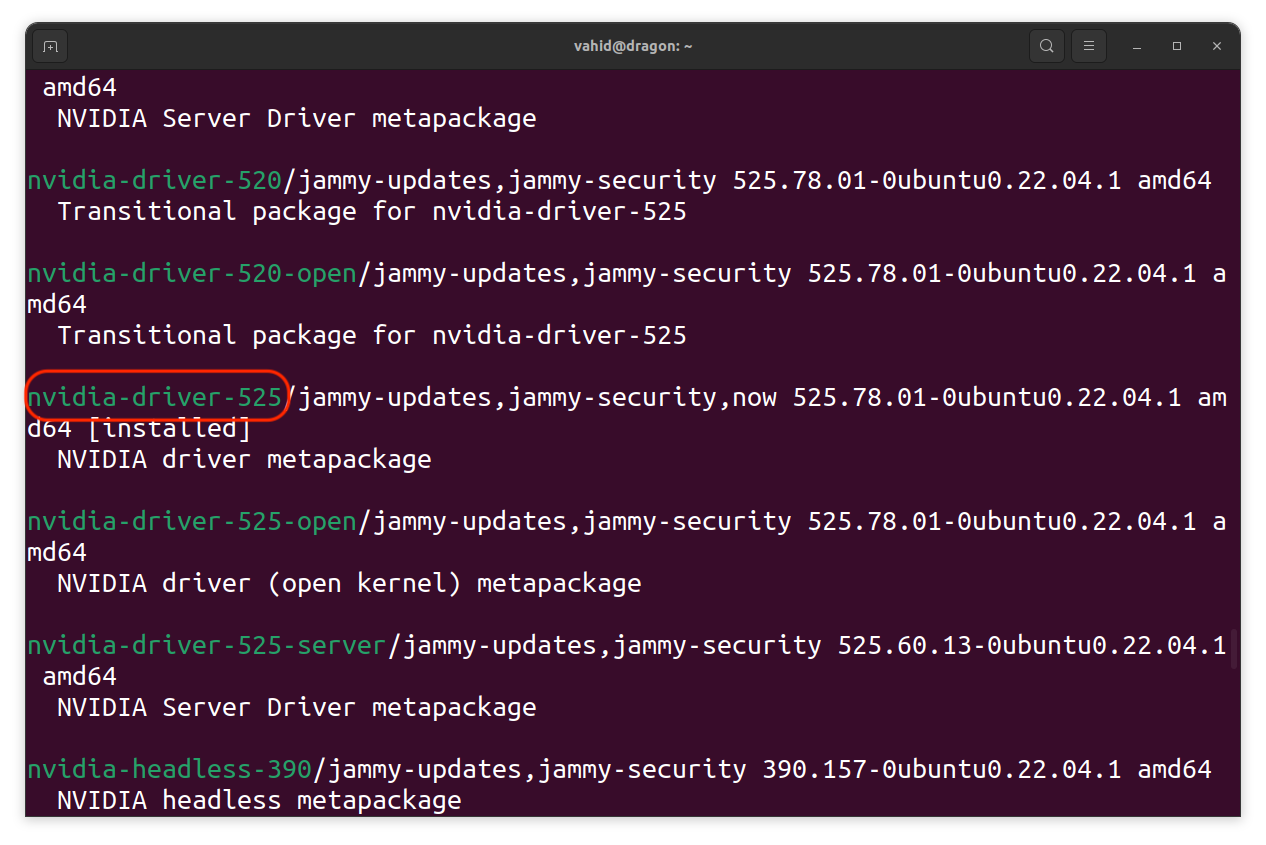 |
After a successful installation, reboot the system and check nvidia-smi, which will show the driver state:
Monitor CPU temperature
Install lm-sensors
To monitor the CPU temperature, first install the lm-sensors package on Ubuntu, which provides the necessary tools to read temperature data from sensors:
1
2
sudo apt-get update
sudo apt-get install lm-sensors
Detect Sensors
After installation, run sensors-detect to identify and set up the hardware sensors on your system:
1
sudo sensors-detect
Check Temperatures
Finally, use the sensors command to display the current temperature readings from the detected sensors:
1
sensors

Conclusion
In this blog, I showed how to install Ubuntu 22.04 LTS, and then some tricks and configurations for more efficient navigation in Linux terminal. Then, I proceeded with installing NVIDIA-driver, so that we can use GPU for deep-learning computations later.
In the next article (System setup part 2), I will install Anaconda and setup deep-learning frameworks such as PyTorch and PyTorch Lightning.